

We’ve been way behind on the mask game for the kids, solely because we lived in the mountains, surrounded by nature, with few friends and homeschooling. Basically: we weren’t seeing a lot of people or leaving the house much, and certainly not for long periods of time. They have had some masks, of course, for the few times they’ve gone to the dentist or inside the bathroom at Skypark, but we were very unprepared for next week when Charlie starts school and will have to wear a mask for 6 hours a day. So, I thought it would be fun to order a bunch and see which ones are the best and then share our findings with you guys. Just to be clear, in case you didn’t know, I am not a doctor, scientist, or any kind of covid expert. Just a mom trying and asking other parents what is working for them in terms of kid masks. All we want is for our kids to be as safe as possible and feel as comfortable as possible in their masks, right? Caitlin sourced a bunch of these masks, I got the kids to try them on by bribing them with a quarter per mask they try on. Then they negotiated ice cream into the deal which felt fair. Toward the end, we were starting to lose them for sure, but we were still able to collect the data we needed from these children. So, let’s begin with our top 3: First Place: ODD Facemasks – The Clear Winner (But Expensive)These are hands down our favorite. They fit REALLY well — you can actually see their eyes but it also covers their noses completely (and has an adjustable nose clamp thing so it grips). Breathable, but it still feels thick. They have a bunch of different styles that are all very fun for kids, too. The only con is that these are very expensive for a mask ($12 per mask), but I guess you get what you pay for and these certainly seem like they will last a while. They’re a really great material, even I would wear these…and I do. Birdie said it smelled bad when she put it on but we’re 90% sure it was just her breath. Anyway, these get a 10/10 in our book. Second Place: Crayola Crayon Face Masks
These fit great and have a better price point than the ODD masks. They’re adjustable on the ears and have the nose clasp to make sure they stay on & tight. The Crayola ones came very very well-reviewed by your guys too, so I highly recommend these masks. Third Place: Grove Collaborative Kids Face MasksThe photo on the right is me asking “why am I the same size as Charlie???” Very breathable and adjustable on the ears. Big yes. These are for big kids (5-10) so these fit well on Charlie (7), but not as well on Birdie, so they’re much better for bigger kids (like me and Charlie). I guess I have a small face?? Not sure how that worked out. Other Masks We TriedCapelli Smooth Fit Facemask
These were OK in our opinion…no metal nose clamp/adjuster, not very breathable, but very protective (so that’s good). Charlie liked the leopard Capelli one a lot but Brian and I both thought it looked a little too big. Kids Care Cover Protective Mask (Birdie’s Mask)
Birdie wears this one all the time and really likes it (I mean it’s rainbow leopard, how could you not?). It’s really nice that it’s adjustable on the ears (huge plus) but it can have some gapping on the sides which is why we like the ODD ones better for her. Old Navy Critter Face Masks
Okay as far as design goes, these are SUPER CUTE. Very breathable, the kids really liked the fun animal faces and it made them very excited. They’re highly kid-approved but Brian and I thought they looked slightly too big for them and there was some gapping. Beanie Baby TY Face Masks (Elliot)
This was probably our least favorite. Way too big of a gap between the nose and it had a very awkward shape. Both us parents and the kids all agreed they don’t fit well & aren’t very comfortable. Even on the website it looks like it doesn’t fit the kid’s face that’s modeling the mask (what the heck). Cute idea, but a big no for us. Wild Republic Zebra MaskThis mask was cute but was just too big. As Charlie put it: BIG FAIL. They do have some cute styles so I was bummed this one didn’t work out very well. Colorable Kids MasksThese are a VERY cool concept and the kids thought they were awesome but it might be one of those things that’s cuter in theory?? The kids started coloring them IMMEDIATELY which was very fun, but they make me nervous about going in the wash. Charlie tried on 3 at a time (right photo) so if you’re a double (or triple) masker, you could totally do that with these. All in all a decent fit and super breathable, nothing bad to say about it. Gap Kids MasksThis was the point where my kids were starting to lose it so they didn’t try it on, but since my face is a similar size to Charlie’s, apparently, I thought I would give it a go. Here’s my review: I would totally wear this. Love the style & it’s all in all really great. Some of the facemasks (more of the accordion-style ones) gapped a little on Charlie and Elliot but if you’re an adult looking for a facemask I really liked it hahah. Now a bunch of you guys submitted your favorite kid masks (with photos!). THANK YOU!! We had some clear winners that everyone seemed to suggest, and then a bunch of other cute masks we’ve included at the end. Let’s do it: First Place – Happy Masks
From Jennifer: My kids and I have been wearing the Happy Mask for over a year now. The best and most comfortable mask we have tried. The parrot beak shape keeps it off your mouth so that you can breathe more freely, and (bonus as a teacher) it doesn’t muffle your voice! Super cute patterns, or plain colors. Now that the whole world has discovered them, get on the restock list ASAP!! From Laurie: I have three kids and they have a strong preference for Happy Masks and I’ve spent more than I would like to acknowledge on masks for my kids. As a parent, they are also my favorite for filtration. The downfall is hand washing but we all make sacrifices. From Carly: Vog Masks and Happy Masks both fit kids amazingly and are comfortable, won’t send my kids to school without filters! But they are $$. Other friends love Baggu masks. From Emily: Hi! Happy Masks are expensive but totally worth it. Great fit, and super safe. Cute enough prints. Don’t need to wash them between every wear. Highly recommend! From Erin: The best mask we’ve found for our 2.5-year-old is the Happy Mask Pro Series in the Kids (S) size.
Second Place – Baggu
From Grace: They are expensive but high quality and didn’t immediately get soaked (as all kid masks seem to do). They also have wire but still washed well- some of the ones with wire get all twisted and need to be hand washed and who has time for that? Plus she was really feeling herself in it if you can’t tell From Emily: They have a metal strip on the top to bend for comfy nose fittings and adjustable ear straps—also best patterns and solid colors for the win. My boys love them. From Jennifer: Best ones…. And we’ve been through A LOT!! (Jennifer’s kids also love Rothy’s) From Erin: Baggu is our jam! Third Place – School Mask Pack: Crayola
From Kirsten: The Crayola mask packs are the best we have found so far and have great deals! They have adjustable straps and both of our kids love them. They won’t wear any other ones I have tried! The picture is of my son Oliver who is only 4 and puts it on before we leave home! From Alexina: Hands-down amazing fit in the age 2-5 category: Crayola Kids Mask Set, Size Small. Very affordable. Comes in a pack of 5. Fits PERFECTLY. Does not ever slip below the nose. The ears have adjusters so that you can get the perfect comfy + snug fit. Fits PERFECTLY. This year, I also bought patches from an Etsy shop and ironed them on for a fun twist! The Etsy shop I purchased from is Honey & Apple. The other Crayola masks that are sold have designs on them, and they are…. Not cute. But buy the solid colors, and add your own sparkle, if you want! From Amanda: Yes! The Crayola 5 pack for back to school. One for every day and the kids get to pick their color. Comes with a mesh bag for washing. My kids are PICKY, and said it’s breathable and comfortable (adjustable nose and ear grip) and it’s the best one we’ve had! I’ve bought them tons of all varieties so I’m shocked and really happy they love them. Going to get more for sure. Honorable MentionsLUCIFER KF94 Kids Face Mask
From Katie: These are the best ones for little faces VistaprintFrom Zoe: We love the Vistaprint masks because they come in so many cute patterns, are very comfortable, adjustable with a nose piece, don’t move around when you talk, fit tightly to face, and have a pocket for a disposable filter which they also sell. We just went back to school mask shopping on their website! My kids actually get excited to pick out their daily mask and then forget they are wearing it. And nope, I don’t even work for this company. Just love it and want to share From Oona: We love the VistaPrint masks- they have a wire over the nose (non-negotiable in a good mask), adjustable ear loops, and fit really snugly on the face. Plus a pocket for filters, which they sell as well. Highly recommend! Here are both my kids wearing them. AthleticaFrom Skye: My 10 & 13-year-old both wear Athleta Women’s sized masks. Our whole family uses them exclusively. My 13-year-old has a slimmer face than our 10 year old and they fit her well too due to the pleats, nose wire, and adjustable straps. Hands down best mask out there. From Kristina: Hi! Athleta youth masks are the very best. Our son has worn them for a year and a half now. He’s almost 4.5 now, they grow with kids because they are adjustable straps around the ears. He actually wears it “upside down” with the little cup that is intended for the chin as a better notch on the nose. It never falls down and that makes it the best kid mask ever. Joah LoveFrom Allyson: Hello! We just got these from Joah Love and LOVE them. Aven calls them the comfy masks. They have some with lanyards (not the right name) already attached. We only got three and I wish we’d gotten more. They are just a little pricey. I also ordered some Henry masks, but still waiting for those to arrive. From Lauren: Can’t recommend the Joah Love masks enough! They are soft, cinch on the ears to get a comfortable, custom fit (no gaping) and have washed and worn beautifully over & over again throughout the pandemic. My kids wear them without ever complaining! Kids ages 4-5 and 7-8 both have a great fit in the kids 2-6 size. I also wear these and have ordered them for other adult family members – so good & universally beloved by all who’ve tried them. Henry MaskFrom Tiffany: I absolutely swear by these masks. My kids loooooove them. Even with school starting, they say how comfortable they are to wear all day. They are called Henry Mask. It’s a black-owned company. There’s a monthly subscription and each month you select different colors/patterns of masks. Either two or four. You can always pause the subscription if you like. They sell adult masks as well. These masks have a unique shape so they do not touch your mouth or nose. There’s also two different ways to wear the mask. Around your ears or behind your head. The best part is the masks are also washable and they are perfect for glasses, you don’t have to worry about them fogging up. Although the subscription is a better deal they do have their masks on Amazon. The choices are more selective. More Great Options That Came Recommended
Ok, that’s it! I hope this is helpful. I know this is all my friends and I have been talking about so figured I would do a little extra legwork to help you in case you needed it. Also THANK YOU again to all the parents that submitted. I really appreciate you. xx The post Kid Mask Review – Our Kid’s Three Favorites (And 20 That We Crowdsourced From Real Parents That Fit Well And Their Kids Actually Wear) appeared first on Emily Henderson. Originally from Emily Henderson https://ift.tt/3sU4M57
0 Comments

OH BOY, BUCKLE UP. Today’s post is one for the books. We have a renter-friendly design! We have $7 pieces of vintage furniture! We have pieces pulled straight from the neighbor’s trash pile! We have Facebook Marketplace scores! We have DIYs (all worthwhile, albeit some more carpal tunnel-inducing than others)! And more importantly, we have a TON of knowledge from a gal who combined ALL these things to make her home look like a million bucks. Here’s the deal: longtime reader Liberty Riggs spent a decade working as a creative director in advertising before taking the leap and partnering with her husband to open her eponymous interior design firm, Studio Riggs, during the pandemic. “My husband used to work in construction as a CFO/project manager, and we really loved the idea of creating a family business that we can build together and (hopefully!) bring our kids into one day,” Liberty said. (If that wasn’t cute enough, do you see how sweet that website is??? You can tell that she was a branding pro, right?) ANYWAY. Liberty sent me an email earlier this month while we were on our team retreat with a few teaser shots and EHD collectively lost our minds (in the positive way) – we were so excited to see someone who could make fun, eclectic style work in a bright, fresh, and affordable way (AND in a rental, no less!). I ended up sending her ~1 million questions about her thought process and can’t wait to share her wisdom with y’all, so let’s take a peek inside Liberty’s house while we get to know her a little bit better, yeah? 
Footed Bowl (similar) | Basket It only makes sense to kick it off with the entryway, you know? We’ll go from the ground up. Yes, that is stone inlaid with hardwood – “honestly, the only little bit of character this house had when we moved in,” Liberty told me – but MY OH MY, I lost my mind over this vintage chest paired with the bust, modern art, and graphic bowl. The kicker? “I made the art in the entryway with some extra Farrow & Ball sample tins I had sitting around. The bust and dresser were both thrift finds. I literally paid $7 for the dresser in college and have moved it with me to three different states!” She’s talented AND a gifted vintage shopper, guys. We’re going to keep it moving by touring her daughter’s room next… Small Bin | Large Bin | Unicorn I teased the canopy a little bit with that opener photo above, but we’re starting this room off by taking a peek at Liberty’s jumping-off point: this awesome wall art. “I made the tiger painting in my daughter’s room for her very first nursery and it gave me carpal tunnel so now she has to live with it forever, so I based the color scheme off of that. Originally I just painted the walls but it felt unfinished. A lot of historic homes that I looked at had contrast trim, so I just went with it.“ I love the scale of this bench between the two doors, but I also love that this is such a lovely and bright and happy room for a 3-year-old that doesn’t necessarily scream “a toddler lives here!!” Liberty’s done such a good job of making a space that her daughter can grow into, you know? 
Y’all know how I feel about a canopy (spoiler: I love them), so I was so taken by the combo of the patina on this gorgeous bed combined with the sweet and happy scalloped half-tester. “The canopy is a DIY. I screwed the corners in the ceiling and literally staple-gunned the sides up. When we take it down I’ll just have to spackle the little staple holes.” Phew. She makes it sound so easy! I also had to ask Liberty if she had any tips about layering rugs over carpeting, and she came through. “These rug pads for carpet are MAGIC!” Thanks for sharing, pal 
Sconce (sans cute fabric) Next up, I adored how she carried the scallop motif over to the skirted bedside table. When I asked her about the choice to go with a table instead of a more traditional nightstand, she said “Since she’s only 3 she doesn’t have a lot of needs in terms of nightstand storage, so a skirted table made sense.” I had also assumed the sconces were vintage and was SHOCKED to find out that they were a DIY – “The sconces are actually IKEA! But I got on a bit of a lampshade-making kick recently and made the pleated shades for them.” (Please leave a note if you also think we should have Liberty back for an instructional lampshade post. They look so high-end and totally transform the sconce, right?) 
Swoon – a pattern mixer-and-matcher after my own heart. I recognized that Target x Jungalow bolster right away, but begged for the sources of everything and was SO JAZZED to learn that they were also more affordable options. “The lumbar and striped pillowcases are from Target, and the rest of the bedding I just picked up at Tuesday Morning.” I’ve been such a huge fan of the purple and mustard combo since seeing how Julie pulled it off in her bathroom last year, but it’s just so masterful and restful in this space. Big color, big pattern, still calm. 10/10! When I asked about her inspiration, Liberty said, “I’m so inspired by a lot of the English designers right now – Studio Ashby, Louise Roe, Beata Heuman. But I’m also a former art history major, so that’s a big influence as well.” I don’t know about y’all, but I think we can all tell that she probably aced color theory 
Ceiling Medallion (similar) I couldn’t leave this room without calling out the lighting update. “In every room we’ve been adding ceiling medallions as we swap out light fixtures. It’s just a really cheap, easy way to make the house feel less like an early 2000s box.” And for anyone who was curious – I obviously was – Liberty got the blessing from her landlord before making changes. “We asked permission to paint – everything else I just plan on reversing before we move out. I don’t mind the expense because we plan to be here for a while.” Next up, we’re moving into the office… 
OH MY. The built-ins (that are not actually built-ins)! And THAT DESK (that I soon learned wasn’t a desk!) “The desk is a vintage console made by the Mt. Airy Chair Company that I had a stone top cut for,” she told me. I love how Liberty took a vintage piece and made it work for the space and function she needed – it’s a great lesson in sustainable shopping, too. She gets a one-of-a-kind show-stopping piece and we get to ogle it on the internet. Everyone wins! “We snagged some vintage bookcases off Facebook Marketplace, trimmed them out a bit, and painted them the same color as the walls. The office is the one space I don’t have to share with anyone else in the family, so I hoarded all of my favorite things to fill these shelves.” And what a lovely payoff, right? There’s such a nice color scheme here and it’s the perfect amount of “collected” without feeling “cluttered.” ::chef’s kiss:: 
Just wanted to include the pulled-back shot for full effect. WHY ISN’T THIS MY ZOOM BACKGROUND? I wish I worked here. (PS. You can see a glimpse of another handmade lampshade on the left – we gotta get a tutorial, right?!) Last but not least, I just love the mix of styles here – the cabriole legs, the stone top, the animal print seat (truly, Liberty’s a girl after my own heart). If there was any doubt, when I asked about the chair, she said this: “I embarrassed my mother by pulling the cesca chair off her neighbor’s curb on bulky trash day!” We love a furniture-saving hero!!! We’re going to move into the family room now but before I show you the after on this fireplace, let me give you some context: “We started looking for a rental in January, and it was insanity! I think so many people sold their houses and were having a hard time finding a new one that the market was much more competitive than it had been previously. This house was actually the 5th house we had applied for, and definitely not our first pick (it was very boxy and beige when we toured it). But as a designer, I love a creative challenge and knew I could make some lemonade out of this lemon.“ 
And get this – “We actually just moved in this April! I still have about half the house left to finish, but we are taking a gradual approach to make my husband happy (he’s an accountant – lol). Eventually, we want to build our dream home, but as big believers in the concept of a ‘forever house’, we made the decision to wait until the housing market calms down a little and we have the resources to really do it right.” In the interim, though, some paint and a touch of thoughtful styling made a HUGE difference in the way this room looks and feels… 
“My first thought when tackling the living room was ‘what the hell do I do with this bizarre fireplace?!’ Painting the walls a soft white really minimized the visual impact of the mantle.” AGREED. It truly looks like a different home, and you can definitely see Liberty’s modern-traditional style elevating this formerly-beige space. Had to come in hot with a little zoom on those mantle details. The art is so good, but how special are those uber-modern striped candles paired with those classic crystal holders? But this sofa is what really took my breath away, and Liberty stunned me with the source – “I had the sofa made without the fringe by Monarch Sofas back in 2016. It was still in great shape when we moved into this house but it felt a little too MCM for what I was doing. The bullion fringe came from eBay and I applied it myself! Now I’m in love with this sofa all over again.” Can you believe??? That fringe totally transformed the shape – it’s such a classic style now and I never would have thought that it had lived a prior life as a mid-century-inspired piece. (BRB, running around my house and seeing if I can switch up any pieces by adding some thoughtful trim, see you in a second!) 
And of course, I have to show y’all Liberty’s coffee table – how good is that tray? Her styling advice: “Just go big with your accessories and books. Like absurdly big. I would rather have one giant, gorgeous thing on a coffee table than a bunch of tiny things. And for me, it’s just more practical with two small kids (less stuff they can walk off with). For any vignette it’s always good to add something crystal or metallic to bounce the light around.” WOW. Can you believe how productive she’s been in four months? I’ve been in my apartment for two years and am almost finally ready to show off some tiny spaces – I so admire her decisiveness and her innate style. More than anything, though, I love how cohesive this home feels despite not being too matchy-matchy – when I asked for advice (very selfishly, TBH), Liberty said, “I made a moodboard for the whole house before we moved in and just try to keep that as my ‘North Star.’ I also decided that the palette was going to be all garden-inspired hues, which gives a lot of flexibility while still feeling related.” It definitely paid off, right? 
That’s all for today, but I just wanted to say THANK YOU to Liberty for taking the leap and sharing with all of us and THANK YOU to you, the readers, for joining us on this little tour of her house. If you’d like to stay up-to-date with her future projects (and you should – if the renderings on her website are any indication, they’re going to be SO GOOD), you can follow her on Instagram right here at @studioriggs. Let’s all leave her some well-earned props in the comments, yeah? Hope this got your weekend off to a great (and inspired!) start – we’ll chat more with you down there. xx *Design and Photos by Liberty Riggs The post A “White Box” Rental That Was Turned Into A Stunning Eclectic Home Via Very Budget-Friendly Buys (Like A $7 Dresser) appeared first on Emily Henderson. Originally from Emily Henderson https://ift.tt/2Wq2Nte 
Gah, this is an exciting day! Our sole purpose on this blog is to teach, inspire, and learn from each other. So when we see one recreate or be heavily inspired by an EHD design it’s basically the best compliment in the world. We are big on “imitation is the best form of flattery” peeps. Of course if a professional designer legit copied one of our designs and didn’t credit that’s not great but that’s not what we are showing you today:) Since we check out the #ShowEmYourStyled hashtag pretty often, we have seen the truly awesome way you’ve made our designs your jumping-off points. Some are real spot on while others are more in the “inspired” camp. Regardless it’s freaking cool and so without further ado, let’s see some rooms! THE BOOKSHELF!!!
Emily has a handful of “iconic Emily Henderson design moments.” But I think her Glendale home custom bookcase is HIGH on that list. Well, Ashely Wilson also loved it and decided that she wanted to recreate it in her home. This is how and why she chose this design… Ashley’s Spot On Bookshelf ReplicaWhy this design? I was first drawn to Emily’s bookshelf because of its uniqueness, I don’t think I’ve ever seen a built-in with the V structure. My home is filled with wall art and trinkets from my grandparents from their travels, and I wanted something that would display the items, but not look cluttered. I feel like the V shape helps break up the shelves, allows you to easily create vignettes. How did you go about getting it made? For me, it was easy to replicate! A long-time friend who’s been a woodworker for 15 years created it for me. We were out drinking late one night, and I recently purchased my house, and I’d gone through many shelves that just didn’t cut it. I showed Sam a picture of Emily’s bookshelf and told him this would be my dream come true, and he said, “Yeah, I could do that”. I knew he was talented, and that’s he’d be able to replicate something similar, and I was blown away when it really was an exact replica. When I first posted the built-in on my Instagram, I had a couple of friends reach out saying, “I thought you purchased EH’s house!”, because they are also big fans and familiar with this iconic built-in. Challenges? The biggest challenge was finding the right baskets! I can’t tell you how many baskets I purchased from Target to see what looked best. Then when finding the ones I liked, showering all of Atlanta to find 4 of them. Another thing I love about the shelf is that it hides my nest and light switch, but also presented some challenges in finding the right items to hide them but also gives easy access to use. What did the cost shake out to in the end? It was around $5,500 for materials, labor, renting Uhaul to deliver, and hardware. 
Amazing job, Ashley. It looks awesome and I think we all could use in a Sam in our lives:) Onto the next room…wait but first, here’s a little video we put together since we love your rooms so much (just wait for the ad to play): Moody Blue Bedroom
When I first saw this bedroom it kinda took my breath away a little. It’s both moody and airy. Katherine Randall was also very taken by this room as she took some big inspo for her bedroom. Katherine’s Not-Too-Moody Blue BedroomWhat drew you to this design? I loved that it was dark but still peaceful, it wasn’t like other moody rooms I had seen before where they look more gothic and “drama”. I loved that it would make the tv/soundbar recede, we already had some dark furniture, and I have loved staying in quirky boutique hotels, so I loved that vibe. I also figured since there is already an absence of natural light, I might as well embrace the darkness and make it calm. How hard was it to replicate? It took a little bit of trial and error, I started with Sherwin-Williams “Moscow Midnight“, and went from there, I got that cool shibori quilt from a round-up here on EHD and found some brass accessories (tray, knobs) from IKEA, Amazon (mirror), and some thrifting (lamps, wood tray) Any challenges, fun stories, etc? This was last year (so hello, pandemic boredom) where I had been ruminating on it, and decided to pull the trigger in the last 4 weeks of my maternity leave! So I would get him set up for a nap etc. in another room and barricade myself in the bedroom with the baby monitor! My husband was working from home at the time, so he could help too if my hands were covered in paint, but I think I still ruined a onesie or two! The mirror we mounted on the wall (glass only) and then adhered plastic strips covered in metallic tape, to mimic a brass frame. The lumbar pillow (found that one on sale at Anthro for $40!) is the perfect compromise for a wife that wants fun pillow(s) on the bed and a husband that “can’t be bothered” so even though he chucks it onto the chair or floor at night, at least it’s only one! What was the overall cost? We already had most of the furniture, probably spent about an additional $800-1000 for paint, bed bench (Article), rug (Rugs USA), brass accessories (Amazon and IKEA), lumbar pillow (Anthro), blanket on headboard (Nordstrom Rack), lamps (thrifted find). Emily Bowser’s Guest Room
Emily Bowser has the most amazing talent for creating layered, welcoming, and beautiful spaces (with a ton of great and copyable DIYS!). So it’s no surprise to me that this room caught the eye of probably many readers. But today we are focusing on Briana Kaya’s interpretation. Y’all she even did the magazine rack! So cool. Brianna’s Hardest Working And Coziest Guest RoomWhat drew you to this design? I thoroughly enjoy EHD’s inspiring but replicable design. The mix of affordable products I can find at Target or Home Depot, to Em’s shopping for pieces on Craiglist to paint and incorporate into her home, and the DIY I can do myself. I love seeing actual rooms transform with paint that are moody and different, but something you would see in an everyday home. That’s really what I wanted for my guest room. So when I saw a dark moody room could be functional and welcoming and that’s what I wanted, down to the paint on Emily Bowser’s ceiling. I also loved that it worked as completely different spaces, a guest bedroom, and office space. For my space, I wanted a room that would inspire my daughter’s sewing and crafting and could still be a cozy spot for guests. It’s a work in progress, (we plan on replacing the carpet, replace the ceiling fan and soon and finishing the closet) but I loved her DIY magazine rack, her high shelf, the functional office space and shelving, and how she incorporated art. I painted the pieces myself to save a little and even found a dresser on Facebook Marketplace and painted it to give it new life, where my daughter stores a lot of her material and crafting supplies. After creating the magazine rack I was inspired to make my own day bed out of leftover flooring. Also, I couldn’t help stealing some of the pieces she snagged at Target, like the long faux leather pillow. It really helped transform some of the items I already had in the space. How hard was it to replicate? Not hard at all. I had a lot of fun making the rack and the shelf! Any challenges, fun stories, etc? I found the walnut was just as hard to nail as Emily said in her tutorial. My daughter calls this room her second room, and she spends just as much time messing it up as she does her own. It’s really turned into a functional space we all love. What was the overall cost? $150 for the paint (Benjamin Moore “Gentlemen’s Gray”), $200 for two sconces, pillows, and the Opalhouse lounge pillow on the daybed (all Target). $125 for the dresser and antique mirror on Facebook Marketplace $50 for wood/paint for the high shelf and rack $25 for legs for the daybed. The rest was pieces I had around the house, old flooring for the daybed, knobs for the closet, etc Mountain House Guest Room
This is truly the only bunk room I will probably ever want to sleep in so replicating it (well with one bed) makes perfect sense to me… and Heather Waibel. What is extra fun about her interpretation of this room was that it looks like it was more from the styled single shot than how the room ended up being designed (more mauve-y pink). I personally LOVE that “temporary” look too. I’m not choosing favorites but that deep rust hits my design heart hard. Heather’s Luxe Mountain House Guestroom DupeWhat drew you to this EHD design? Perhaps 6 years ago, a very stylish friend of mine told me about EHD and I started following the blog. I didn’t own any property so I wasn’t super into design, and I just read it casually. Then, during COVID, we impulse bought a house near a lake in the Pocono Mountains (like so many others, we were desperate for space and outdoors, living in NYC). Suddenly, I had a whole vacation house to decorate from scratch, and I realized my years of reading EHD were paying off. Out of nowhere, I seemed to have a design sense that I assimilated from your blog! I absolutely loved the vibe of Em’s Mountain House and set out to create something special just like it, since our house was also a mountain/lake house. How hard was it to replicate? First, I used all of the tips I learned from EHD on how to make mood boards and room designs. I used Keynote to mock up the room which really helped me to select the right pieces and see how everything would work together. For the furniture and decor, I took a lot of direct inspiration from various EHD posts (and every post on the Mountain House). I decided I loved the oak spindle bed and the Target velvet comforter in the rust color very similar to Emily’s post, so I incorporated those into the room (the bed is actually a cheaper version I got on Overstock). I also really wanted to go for a similar wood and neutral color scheme that felt super cozy. Beyond finding “pieces” from EHD, I also learned a lot from you all on “design techniques.” I’m an operations person, so for me, anything that can be put into a “formula” to follow makes it click in my head. Thus, I religiously followed every formula I could find on the EHD blog about how to make the perfect bed arrangement, decorating your dresser, finding the perfect rug size, hanging art, etc… Any challenges, fun stories, etc? The biggest challenge was assembling that bed! It came in a million pieces (each slat had to be screwed on individually) and it took us hours. We even had to re-do it once because we did something wrong, so we essentially assembled it twice. It’s also pretty creaky, so I wish we went for a more expensive bed. The other tricky item was the West Elm swivel chair (which I LOVE). Due to shipping and manufacturing delays, it took months and months to get it. What was the overall cost? It cost $2,823.68 (being a vacation house we had to buy everything- mattress, sheets, etc…). Brady’s Bedroom
Brady’s bed might be the most redone DIY that we’ve ever published. But I mean look at it. It’s so elevated but approachable and balances perfectly with the more organic elements he’s known for. So when Yassie Entekhabi sent in her submission we were delighted but not surprised. However, she put her own spin on it by choosing to go vertical instead of horizontal. It’s so great so please enjoy. Also, enjoy that tree because it’s very cool too. Yassie’s Flipped Brady-Inspired HeadboardWhat drew you to the EHD design? I was in the hunt for a headboard for our new king-size bed and I hated everything I found, except a very cool wooden/leather combo piece that was $3,000 and so over my budget. I was ready to splurge but started looking for some DIY inspiration and came across Brady’s post and thought, this is perfect! What sold me was the shorter design, everything I’d seen online to buy or make was just too tall and for some reason that just felt very passé to me (but I’m no expert). How hard was it to replicate? Not hard at all! I’m a very visual learner so I basically built it in my head with the help of the photos and step-by-step instructions. I’d never upholstered anything before so the links suggesting what to buy were super helpful. Thank you for that! Any challenges, fun stories, etc? Sourcing a staple gun from my network of friends proved to be the hardest part. Watching me use said staple gun and assorted power tools was my husband’s favorite (obviously I found protective googles in my college costume box and wore them for the entire project). Observing my mom do math in her head while we were fabric shopping was the most hilarious (she always gets there but let’s just say it’s not a linear journey…). Seeing the final product in our room was 100% the best. Getting compliments regularly for three years now is 1000% the best. And nursing my staple gun blisters after was just made me laugh. What was the overall cost? About $450 for materials. The Portland Kitchen (Times Three!!)
The Portland Kitchen is another iconic EHD design. So much heart and soul went into designing and styling this kitchen. Plus that rich grayish-green is just so perfect for a kitchen that you want to pack a soothing but impactful design punch. We love it, you love it, and three of our readers sent in their kitchens that were heavily inspired by it. We are going to start with Melissa Nunez only because her picture is TOO FUNNY (and the kitchen is very pretty too:)) Melissa’s “High Low” Portland-Inspired KitchenWhy this kitchen design? Emily’s Portland Kitchen was just total goals for me. The floors, the windows, the brass hardware, gah! All so good. But the real showstopper were the cabinets in Pewter Green by Sherwin Williams. <3 Our kitchen had a very similar feel – big windows on the left with the sink underneath, big island and range in the middle, and a fridge to the right. Also just due to the funkiness of the layout, we also could only tile right above our cooktop. The similar layouts really helped me to visualize how it would all come together. Our budget was a wee bit smaller than Emily’s (ok a lot smaller), but I think we got a very similar vibe in the room. The items I got inspiration from that I tried to mimic were: green cabinets, white subway tile backsplash (we did a herringbone cabinet for ours), hardwood floors, brass hardware, black with gold sconces, white sink, mixing metals (Emily had a polished chrome faucet and we had black but mixed that with the brass hardware and stainless steel appliances), the stone (we did quartz instead of marble), window treatments (we don’t want to block the view!), and the adjustable chair stools. What drew you to the EHD design? We bought our fixer-upper in October of 2020 and I really didn’t want to do another “white kitchen” which is what is popular right now. Even my contractor said, “so we’re going to paint these cabinets white?” No! When I saw the Portland kitchen I was INSTANTLY drawn to the green color of the cabinets. They just made the whole room pop. Also as a first-time homebuyer, I felt a real urge to use color! Something you can’t always do in a rental. The Portland Kitchen also had a very unique layout that again was magically like ours. Our kitchen also opens up to a family room so we really had to think about how we positioned the island and moving between the two rooms. We also had one wall with big windows (which we love!), and while I wanted a tile backsplash, I wasn’t entirely sure how to do it without a natural place to terminate it. Do we go to the ceiling then? It was a good reference point to see that Emily did a six-inch backsplash with the counter marble and then tile over the range. We did a similar six-inch backsplash under the windows and then a herringbone white tile behind the cooktop. We actually continued the six-inch backsplash around the whole counter and while I don’t hate it, in hindsight I should have had the tile meet the counter on that part. How hard was it to replicate? Not hard at all! I felt like I was on the HGTV show “The High Low Project” with Emily’s Portland Kitchen being the high and my kitchen being the low. Emily listed the paint color so that was easy to get and replicate. And then I just found more affordable options. Don’t get me wrong, I would have loved to have shopped Rejuvenation for my hardware, lighting, and stools – but it was just out of budget. I have 40 cabinets in my kitchen! That hardware budget alone would have been blown out of the water! I sourced brass hardware from Home Depot/Amazon/Wayfair, we went with quartz over marble, white undermount sink over an apron sink (mostly because we didn’t want to change any of the existing cabinetry), black and brass light fixtures from Wayfair, modern artwork from Etsy, and similar schoolhouse looking stools (mine are from Target). We did end up needing custom blinds so that similar to the Portland Kitchen, we could let as much light in as we could through our giant windows. Our house is built on a slope so our kitchen sits high (almost like a second story) and it feels like we’re in a treehouse. It’s one of my favorite things. Challenges? Funny stories? As first-time homeowners buying a house during a global pandemic, with two small children, during fire season in California – the experience was something else, to say the least. We were actually supposed to close on our house in September, but then the Glass Fire actually broke out IN OUR NEIGHBORHOOD and our closing was pushed back for obvious reasons. We feel very thankful for the firefighters that were able to save the majority of the homes. When we finally got to close we had 30 days before our move-in date to do all our renovations, the kitchen being the main one. Since our closing was pushed back all the scheduled work had to be pushed back to so those 30 days were just nonstop. The day we moved in, the tiler was finishing our backsplash, the can lights were being set, and my husband and I ended up having to install all the kitchen hardware ourselves. We had also had to buy a slighter nicer cooktop only because if we wanted a cooktop before Christmas, it was the only one in stock due to COVID. I’m still amazed that all of our appliances were in our kitchen when we moved in. Totally worth it, but exhausting. Budget Breakdown
TOTAL: $23,934.37 One thing I do want to point out, and I don’t know how to break out these costs, is that we had the interior of the house professionally painted, plus new floors in every room (with the exception of the bathrooms and the laundry room) with new baseboards. Our kitchen did benefit from the newly painted walls and the new floors, but I don’t know how to break out those items so you won’t see that here.
TOTAL: $23,544.49 Our total budget for all house things was $40,000 so we did go over by $7,500. But I’m also including EVERYTHING in this total. Some things we didn’t account for were how expensive paint is, how install can actually be MORE expensive than the product, and that COVID would cause us to maybe spend a bit more on something so we could get it in a reasonable time frame. Jess here! That is incredible and thank you Melissa for giving all of this extremely helpful info! Now let’s pass it to Kelly Lukens… Kelly’s Modern Take On The Portland KitchenWhat drew you to the EHD design? The EHD design is just timeless. It’s a great mix of classic + modern with a few elements of bold details and there is a very livable feel. I loved this design particularly because I knew I wanted one wall of windows to let in all the light, and then maximize cabinets/storage on the other two walls. And the color is what drew me in the most! I tested similar greens and nothing compared. How hard was it to replicate? We were doing a huge renovation, so we designed this kitchen from scratch. In that sense, it wasn’t hard because I knew what look I wanted to achieve and was able to get it exactly with a blank slate. The shaker cabinets were a simple choice and I looked at the EHD hardware placement post over and over to get the exact look (mine is a slightly different placement than the Portland Kitchen). The color was easy- Pewter Green- thanks to the Portland Post, but we did test other greens just in case. There were some other things I considered from the Portland house – like the glass cabinet inserts on the side or the concealed hood, but I went in another direction because I think my take is just slightly more modern. Challenges? Fun or funny stories? Big challenge renovating in the pandemic! Our permits were two stamps of approval from the city away when the pandemic hit so everything was delayed. Let’s see: My husband spent months and months picking out all the appliances he wanted – they were all different brands and he researched and dragged me to SO MANY showrooms. Then the week before it came time to purchase, Thermador came out with a Black Friday package deal and he changed his mind on everything and just went with the package. Renovating during the pandemic is a waiting game. We waited a VERY long time for everything. I’m still missing 6 handles and they aren’t scheduled to arrive until February 2022! Just a great change for us. The original kitchen was a 1950s box with green countertops and orange vinyl flooring. The only windows faced the neighbor’s wall next door + one window looking out to a window in a stairwell. Busting open the back wall and getting all the light was worth every ounce of effort. Convincing our contractor to go postless on the island was a bit of a challenge. My husband is a mechanical engineer so he detailed out how much force exactly an overhang the size we wanted would take. Definitely some back and forth with them as well as ordering machined parts off Amazon to pull it off. What was the overall cost? We are in San Francisco ($$$$) and we re-did about 60% of the house. So I’m not 100% sure how to break up the cost of the kitchen alone… Probably close to $125K w/ cabinets, windows, countertops, appliances, and lighting. But a room this big was a long time in the making. A LOT of trips to tile (Fireclay), flooring, showrooms (Home Depot showroom in San Diego, we went maybe five times), appliance stores, and online research. So happy to have EHD as inspiration! Jess again! Well, it looks so beautiful and from the picture looks well worth the wait. Now, last but certainly not least… Sara Ugino. This lady clearly loves to cook (based on her Instagram) so we are very honored that she choose one of our kitchens to be inspired by to make her wonderful creations in. Sara’s Portland-Inspired FaceliftWhat drew you to the EHD design? We were so inspired by this kitchen that Emily designed, we used it as our blueprint for our kitchen facelift. We are mostly done with the update, sadly our new appliances haven’t arrived yet so it’s pictured here with the current appliances. 
My husband and I both love to cook and bake and we spend a ton of time in the kitchen. We moved to a 50s era ranch-style house in NJ from a small apt in NYC a few years ago. While the new to us kitchen was bigger than what we were used to, it just wasn’t everything we wanted. We had grand plans to gut the whole thing and start from scratch but that was totally cost-prohibitive. Looking through Pinterest, my husband and I were immediately drawn to a photo of this EH-designed kitchen. When we saw the photos, we realized that we could take our existing kitchen and implement some of these designs without any major construction. How hard was it to replicate? Overall it wasn’t difficult to replicate. We had the cabinets professionally painted, I picked out the champagne knobs and pulls at Home Depot. I couldn’t replicate the over sink lighting because of the electric in the soffits but I found an alternative light from Wayfair. Budget Breakdown I think the overall cost for the kitchen was around $6,000. The new appliances cost the same and we still don’t have them. We will have them all installed next week. What we did was remove the soffits, paint the cabinets, take out the unusable cabinet over the fridge, and added a bookshelf with a wine rack above that. We love the kitchen now and everyone that visits the house compliments the color of the cabinets. I never would have picked that color if I hadn’t seen Emily’s design! The Mountain House Powder Bath (Times Three AGAIN!)
From a beloved kitchen to maybe the most beloved/duplicated powder bathroom on the internet! (my likely partial opinion of course:)). Let’s start with Lisa Kanegae and her stunning take on the mountain house powder bath which is actually a full bath for her son. What a lucky little guy! Lisa’s Full Bath Version of The MH Powder BathWhat drew you to the EHD design? I am so excited for this opportunity. My son’s en suite bathroom was inspired by Emily’s mountain home powder room. She inspired me to tile the entire wall – never done that before and now I am in I was drawn to the bathroom the moment she posted it. I loved the color scheme of the bathroom and the modern vertical stack as opposed to the traditional subway pattern. The floating vanity was a nice element as well. Since this was my son’s bathroom, I liked adding the warmth of wood with a floating vanity but still keeping the same vibe of Emily’s bathroom. How hard was it to replicate? The bathroom wasn’t very difficult to replicate after I found the tile, but the tile was a bit of a challenge to find since I didn’t want to use the same zellige tile Emily used. I ended up finding this tile and it was a pretty blue-grey tile. I wanted the space to feel a bit more modern but I did end up using a different colored zellige in my laundry room. Were there challenges? The challenge I faced was deciding whether or not to tile the entire wall or keep the tile just in the shower. But once I made the 3-D mock-up I knew I needed to tile the entire wall and the impact it made was incredible. Tiling the entire wall was, of course, a splurge but it’s one of my favorite rooms in our entire remodel and it makes me so happy every time I go in there so IMO it was worth it! Do you mind sharing your budget? I believe I ended up spending around $7,500 for the tiling work and finishes. I’m not really sure how much the labor would have been on the framing of the bathroom since it was included in the overall remodel cost, but I’ll just make myself feel better and say $7,500. Funny stories?? I wrote down meticulous notes on the tile layout, where to start the tile, grout colors, all the bathroom measurements and was very hands-on in the entire process. But I was so indecisive on the grout color that I changed the color last minute and forgot to change it on the paper I handed to the sub. I should have had him show me a sample of the color before he did the entire wall but he finished the entire wall before I realized it was too late. I came back shortly after it was finished and nearly died because the grout color was SO much darker since it was wet and nearly had a heart attack!! But when I came back the next day the grout dried and the color had completely changed and I loved it! The color ended up being lighter than I originally wanted but it makes the room feel brighter and happier so it ended up being a happy mistake. Thanks for listening to my fun reno stories and for sharing my bathroom – it really means so much! On to the next!! Amber’s EHD Insider Community Fueled MH Powder-Inspired BathAmber Stater also went for a wood vanity and it also looks so great! I love Em’s stone version but I do love me some closed storage:) Here’s what Amber had to say about her remodel… What drew you to the EHD design? The calming blue of the tile How hard was it to replicate? I ordered quite a few tile samples before finding a good match. Challenges? The main challenge was that I didn’t consider how different a single overhead sconce is vs. a scone on either side. I tried 2 other overheads before landing in this one, which is not a quick or economical way to do it… The members of the EHD Insider Community were super helpful in troubleshooting and I was inspired to learn how to make design mock-ups before my next project. How much did it end up costing? About $3k. This was our first home purchase last June in early pandemic days. I was my own GC and designer for the projects while we lived in the studio in back with our 2 little girls and cat. I would not recommend this to anyone Well Lisa it turned out so great! Shall we head onto the last powder bath?? Tyler’s DIY (WE KNOW!) Teeny Tiny MH Powder-Inspired BathTyler Smith took what in her words was “the world’s smallest powder room” and made it a masterpiece! Love the darker blue tile, love that she used the same hand towel, and LOVE that she and her husband DIY’d it. Here’s what she had to say about the process: What drew you to the EHD design? I spent a lot of time searching for inspiration photos. My husband was over my Pinterest boards and by the time I made a decision he was willing to say yes to anything to get me to stop talking about it 
How hard was it to replicate? It wasn’t that hard but more time-consuming than I thought it would be. While ultimately I thought I had my materials selected at the outset of the project, when they arrived I realized they weren’t quite right, so there was a lot of reordering and returning. For example, I originally ordered the same tile that was in the EHD photo but when they arrived we realized as beginners at tiling the hand-cut nature of them would be difficult for first-timers to deal with. Also, the bathroom was so small and the tiles so thick, that it didn’t leave enough room between the backslash and the faucet to actually use the faucet! Ultimately we used Bedrosians Makato tile in Arashi Blue. It has a handmade look but is ceramic so a lot easier to install, less expensive and the color is deeper, which I think worked well in our space. I loved the leathered, honed look of the EHD bathroom counters, but we were on a tight budget so we selected quartz that has been finished to look like concrete, which I think achieved a similar look. Other than that it was lots of taking our time to research and my husband watching dozens of youtube videos to make sure he knew what he was doing. My husband spent a lot of time doing load calculations to ensure the box he built for the vanity wouldn’t flex and could handle the weight. It was our first time doing tiling, installing a toilet, and doing plumbing. Any challenges, fun stories, etc? Well, our small little two-weekend project ended taking almost 90 days due to all the returns and indecision on my part (black mirror or brass mirror?!?) and a couple of tries getting the right plumbing fixtures to fit our 70-year-old house properly. About 20% of our tiles arrived broken and the long shape of the tile made them hard to score and cut, so we didn’t have many to spare. My husband chipped the color off the surface of our last good tile. As luck would have it, our kids were painting a birdhouse kit and he had to color match touch-up paint with their craft paint! And I’m sure our neighbors LOVED looking at our old toilet on the curb before it was picked up on trash day! This project has inspired us to maybe take on renovating the kid’s bathroom which would involve taking down a wall, but we’ve realized we HAVE to have all the materials selected and on-site before we begin or it may take a whole year What was the overall cost? The total cost was about $2,735, which included tile, fixtures, mirror, sink, new toilet, quartz material, installation, and paint. Mountain House Family Room FireplaceNow reader, Kelly Payne, decided to take one main element of the mountain house family room and make it her own…the fireplace. It clearly turned out great so let’s see how she did it: Kelly’s Budget MH Family Room-Inspired FireplaceI got the inspiration for my basement fireplace from the Mountain House Family Room fireplace. I had to make adjustments to the materials – we did a cement rather than plaster due to cost but got the same bins (we have young kids so those are full of toys) and similar sconces as in the upper floor fireplace in the Mountain House. What drew you to the EHD design? The clean lines and simple modern design with the storage for toys – most importantly! We have 3 kids – 5 and under! How hard was it to replicate? We completed this as a part of my basement finishing project and we had to adjust the design a bit for our basement space and budget. My primary contractor wasn’t able to do the plaster texture of EH’s original design and would have had to outsource it to another expert, which we found was going to be prohibitively expensive. We still wanted a similar texture and modern design element so we did a concrete facade using Durock cement boards and a feather finish skim coat. We also wanted to take the jut out all the up to the ceiling like the original design but we’re were unable to do so because of the soffit on one side of the ceiling in this location. We didn’t want it to look lopsided, so we ended up doing a mantle instead and then matching the benches to the mantle. The mantle also matches the bar top in the wet bar in the same room so it all works. Any challenges, fun stories, etc? This was the first time my contractor did this technique and it ended up cracking the first time they did it. I did the design and my husband and I were GCing the project ourselves – in addition to two full-time jobs and 3 kids during the pandemic (!) So needless to say, my husband was a little skeptical when it started cracking… But they adjusted the formula and reapplied and it turned out great and has held up well! What was the overall cost? It was about $1,000 for the fireplace itself, and $2,000 for construction of the fireplace, mantle, and benches. Silver Lake Hills Kitchen
Dare I say iconic one more time?? Yes, yes I will. This kitchen is another classic EHD design and so beloved. I think it was actually the first reveal post I ever worked on (just making graphics and linking:)). WILD. Anyway, this kitchen is stunning and EHD reader Ludmila felt the same way and wanted to bring in the same energy into her home. I would say mission accomplished. In addition to it being a stunning space, it was also designed to be wheelchair accessible for her husband. You can read all about it here. Ludmila’s Wheelchair Accessible Silver Lake Hills-Inspired (BEAUTIFUL) KitchenWhat drew you to the EHD design? What drew me to EHD was the mixture of vintage and new with some whimsy. I live in a Spanish revival home, so having items (such as the tile) that are consistent with the architecture and style of the home were a huge plus! How hard was it to replicate? The floor tile was an element that was quite hard to find. Encaustic concrete tile, while beautiful, was not something that could work, both in terms of upkeep (periodic sealing and cleaning was something I did not want to deal with), but most importantly, because of its thickness. The main driver of our renovation was to make our home fully wheelchair accessible for my husband, and having a steep transition between areas was a no-go. Thankfully all the visits to multiple showrooms helped me find this gorgeous porcelain tile that is the key of our design. Any challenges, fun stories, etc? Well, any construction is stressful – moreover when you are still living in the property! I became a master of micro kitchen cooking (a hot plate and a table was everything I had over the seven months of construction – and washing the plates on a laundry sink that I haphazardly set in the backyard helped me gain an amazing tanner’s tan. Thankfully our team was amazing and saved some minor details, everything ended in budget and on time! Would you mind sharing the total cost? The overall cost of the entire project was around $265k (but that was not only the kitchen, but an entire addition that doubled the size of the kitchen, added a master bath and a covered patio with some detailed tile work that is the apple of my eye. I would estimate the cost of the kitchen (cabinets, appliances, tile, and labor) to be at least a third of the overall cost. It’s Jess again! I hope you loved seeing these reader’s designs as much as we have. I also hope that maybe you are inspired or that this gave you the nudge you needed to design a space you’ve been wanting to transform. I’ll leave you here since this post is at 7,381 words. But let’s also give these readers the love they deserve! Thank you for the awesome submissions. Love you, meant it. Opening Image Credits: Photo by Sara Ligorria-Tramp | From: Our “Quiet Drama” Powder Bath The post The EHD-Inspired Rooms We Couldn’t Wait to Share… Seriously They Are SO GOOD appeared first on Emily Henderson. Originally from Emily Henderson https://ift.tt/3Bd80DN 
Have you ever looked at a pile of your recent purchases and been like, “uh…wait…am I okay?” Because that’s been my internal monologue recently, and I’d like to talk about it. Historically, I’ve been a little early to new trends, but this one may just be a little too left field (even for me). We photoshopped a few of my latest vintage buys together – maybe you can take a peek and then hit me with your diagnosis, yeah? 
Because guys, here’s my initial diagnosis: I’VE LOST IT. The past year and a half has broken me, and now the only thing that can make me feel joy are 1950s lamps shaped like poodles made out of broccoli and 1960s soup tureens shaped like rabbits made out of cabbage. Do I need to drink out of a glass shaped like a waffle cone? Apparently, the answer is ABSOLUTELY. And like…who wouldn’t enjoy using Pierre the Sommelier to open up a bottle of wine? (Please don’t actually answer that if you hate him – my ego is fragile. I’m feeling vulnerable!!!) See, I’ve been lusting after true antique furniture pieces lately – please throw all your tiger oak and marquetry and cabriole legs my way – but the vintage decor pieces I’ve actually been buying exist in a WHOOOLE other kitschy, fun, whimsy universe. But this whole identity crisis really got me thinking about something Erik said in his dining room reveal about a year ago: “Dressing the table is my love language and it really shows who you are dining with how important that time together is. If you come over for dinner at my place and there are paper napkins and no candlelight, you better eat and run because clearly I’m not your fan. Take the time, especially for supper, and dust off your grandmother’s china and use the nice crystal serving ware. Life is too short to not use your very best stuff. You are worth it.” And not to get too sentimental over my new/old bowls shaped like cabbage leaves and a cookie jar that looks like a lamb – I know they’re no grandmother’s china or crystal dinnerware – but I think there’s really something here, you know? After all this time dining by myself, I’m SO looking forward to delivering a fun experience for the folks who visit my home. (Even if that experience is them driving home being like, “woah, why is every surface in her home covered in vintage painted ceramics? She does know that she can just buy a regular pitcher, right?”) As it turns out, though…I don’t actually think it’s just me. See, a lot of these things never actually went out of style – lettuceware, majolica, and ceramic dinnerware are classics for a reason – but I really feel like they’re picking up steam in a way that we haven’t seen before. WHIMSY IS IN THE ZEITGEIST, FOLKS. I’m willing to take a huge risk to prove it: go open Chairish, and check out the New Arrivals page. I guarantee you’ll see at least a few bowls shaped like not-bowls or plates shaped like not-plates. (And BOY, will I feel dumb if you don’t. I’m really gambling here, friends!) Since my word can only go so far, let’s look at some inspo, yeah? These Bordallo Pinheiro plates are a welcome surprise when you approach the table – they’re perfect for a party but casual enough for daily use, too. I love how lettuceware looks when it’s layered with these more simple pink and white plates, too – it keeps it from feeling too campy. This is definitely the vibe I’m going for in my own home. (And can we talk about the way it echoes the color scheme of the art in the back??? DREAMY.) 
Speaking of color schemes – you can’t go wrong with pink, blue, green, and white. While this definitely skews more traditional with the scalloped placemats and matching napkins, I really like how the playful dinnerware means that the rest of the tablescape can be kept nice and simple. Like a breath of fresh air, yeah? You may recognize Cassandra from her recent kitchen reveal here on EHD, but I’m obsessed with this bright and happy dinner table she designed. As an additional bonus, this is my actual dining table – it’s this one from CB2 in case anyone is interested and I *love* it – so it’s really helpful seeing how vintage pieces can shine on a glossy, modern surface. It’s a mix that still looks really natural, which makes me feel like I’ll be able to pull it off in my own home, too. Switching it up a little and breaking out a new shape: the flower!!! I wrote about the Italian plates I grabbed on our last EHD team trip here, but I’m excited to try layering them on top of a complimentary plate like I showed ya in the first photo. But the real reason I wanted to highlight this one – how sweet are those little tiny ceramic vegetables decorating the table? There’s a tiny radish on the left above the napkin, a tiny eggplant near the top right, and I’m like 60% sure that’s a pickle directly above the knife. Beyond that, how special are the engraved wine glasses? They really do add a little something special. GAH. LOVE. So maximalist, so fun. I know it may be a little much for every day, but wouldn’t it be a treat to eat here with friends? Again, the layering of the plates is just sublime and it’s SO CREATIVE to use a few table runners across the length of the table instead of the width of the table. Put that tip in your back pocket for Thanksgiving if you have a huge family, yeah? 
What an impactful collection – it’s clean without feeling cluttered. MY ACTUAL DREAM – bumping up the impact while limiting the amount of dusting needed. Even though there’s a shelf in front of the window, the lettuce ware really brightens up the whole area, right?? So sweet, so fun. This is ~technically~ an Easter setup, but swapping out that tablecloth would make it work for any holiday. I also love the look of using your decorative plates on the bottom – it feels really clean and thoughtful, despite being pretty easy to achieve at home. Plus, why NOT try dipping a toe in the majolica waters with some sweet little asparagus salt and pepper shakers?? They’ll be sure to bring a smile to all your guest’s faces 
The marble fireplace surround, hand-painted wallpaper, super gorgeous moulding, and dark wood marquetry dining table could make this space feel super formal, but the bright green dinnerware REALLY brightens it up and makes it feel much less precious, right? With fine china, I’d be terrified of spilling or breaking something in this room. But when the plates made outta fake lettuce? I’m ready for a fun brunch with pals! 
Again, nothing more classic than pink and blue (and catch that green glass in the upper right!). The bowl is such a happy and bright touch and it’s SO easy to mix and match with your existing dinner sets. 
You see that wall? It’s not wallpaper – it’s a mural that was hand-painted in the 1930s. This is another case of the table settings really brightening up the space – nothing says “come relax for a while” like a big cabbage-shaped tureen filled with soup/mac and cheese/other foods you put in a tureen. I had to drop these two in here for some holiday inspiration. Like, nothing says “ready for summer” like a whole buncha lemons, right? And I love how the lettuce plates on INSTANTLY holiday-appropriate when paired with red and tartan plaid. Am I winning you over yet? They feel a little less niche to me, and hopefully to you, too Just had to do ONE more lemon tablescape for you – that ceramic napkin ring is so simple but so graphic, especially when mixed with those sweet clippings in a variety of glass vases. It’s like dining on the surface of the sun, but in a nice and happy way. So much life and cheer!!! 
Please look back and take a note on HOW MUCH MIXING is going on here. We see the rug, the seat cushion, the tablecloth, the charger, the lettuce ware plate, the dinner plate, the salad plate, the napkin…and almost ALL of them are different colors. Let this be a lesson (mainly to me, TBH) that when you mix what you love, it’ll always turn out. And I had to close with these shots from Tory Burch – she launched a line in conjunction with Dodie Thayer, the potter who originated the Palm Beach lettuceware trend in the 60s after being inspired by 18th century majolica pieces – and man, aren’t they just stunning? I’m a vintage gal at heart – I love the hunt – but if you’re the type to prefer your dinnerware new, you can’t go wrong with any of these pieces. But I actually *did* want to pull a few of my favorites for y’all, straight off my own Etsy and Chairish favorites. These are the pieces I’m dreaming about adding to my collection – do any strike your fancy? 
1 Strawberry Majolica Plates | 2. Vintage Strawberry Jar | 3. Geranium Plates | 4. Ed Langbein Melon Bowls | 5. Italian Cherry Topiary Lamp | 6. Italian Rabbit Tureen | 7. Italian Lemon Pitcher | 8. Vintage Flower Plates | 9. Watermelon Slice Lamp |10. Italian Zebra Covered Dish | 11. Italian Lemon Bowls | 12. Mid-Century Glassware Fun fact: that’s the cabbage version of #6 up at the top of this post – I actually found mine after favoriting this one on Etsy, which made my in-person purchase feel even more special. For what it’s worth, these are all a little pricey, but I SUPER encourage poking around Etsy for a second – maybe search for “(your favorite food) + (dish/bowl/pitcher/jar)” or just “vintage dinnerware” or “vintage barware.” There are a TON of affordable options out there – these are just the ones that I’m obsessed with right now, ya know? So now, I rest my case. What say you – have I lost my marbles, or are you hopping on the whimsy train with me??? LET’S DISCUSS, PLEASE. Opening Image Credits: Design by Christopher Spitzmiller | Photo by William Waldron | via Architectural Digest The post “Have I Lost My Actual Mind?” Exploring The Return Of Real Whimsy appeared first on Emily Henderson. Originally from Emily Henderson https://ift.tt/3mtrQXd 
We’re back AGAIN with one of our favorite topics: rugs. It’s one of our most requested topics in both “how” and “which one”. And we get it! It’s a BIG piece that isn’t cheap so you want to get it right the first because also, who wants to return a rug?? No one. So, if you are now in the market for a living room rug, or just want to spice things up, we hope these formulas will help you find the one. There are a bunch of new rugs that we have sourced too. Enjoy:) One of the biggest mistakes we see (as we’ve pointed out before) is the “too small rug.” However, today I’m going to walk you through how to not only pick the right size but show you how to lay it out. It’s easy to say “don’t buy too small” but around here we like to be a little more thorough than that. So, we have formulas, rules, and general “no no’s” that can help (oh and some shoppable picks). Let the (fun) rug inquiry begin… 
I know from personal experience how daunting it can be to find THE rug for your living room. Not many are affordable (we found some, don’t worry), and returning them is a pain. But it’s a main piece in your living room so it needs to look right. So first let’s into the nitty-gritty of the rules for each of the EHD approved layout options… General Rules:
Hot Tip
Measure out your desired rug size with painter's tape to get a sense of how it will feel. We promise it's a lifesaver. All Legs On Board
If you have a large enough room and want all of your conversational pieces on your rug (i.e. sofa, accent chairs, coffee table, etc.) then make sure you give yourself around 8″ from the edge of your furniture to the edge of your rug. This way your furniture won’t look like it’s a child getting dangerously close to the edge of the subway platform. Consider the 8″ point your official yellow line. DON’T GO OVER IT OR ELSE. 
Then give yourself around 10″ to 18″ from rug to wall (and maybe even 24″ if you have the space). If you go too much closer your rug going to overwhelm your space and look like awkward “almost” wall to wall carpet. 
The main exception to these rules is if your sofa is up against a wall (or our recommended few inches off as not to crowd the wall). Your rug can get a little closer so you don’t waste valuable common area real estate. Front Legs Only (The EHD Go-To)
This layout is probably THE go-to around these parts (and likely the world). All of your furniture pieces get “to play” but get to have the space to be individuals. Isn’t that what we want for all of our carefully selected furniture?? 
With this one, you want the front legs of the sofa and all chairs to rest on top of it. Here you aren’t playing “furniture lava” where the rug is the only safe zone. Let those back legs hang off and take up space. 
This layout is going to make your room feel spacious even if it’s not. The rule here is to have the rug go under each piece about 1/3 of the piece’s width. For example: If your chair is 21″, make sure your rug is at about 7 inches under it (give or take). Back in the day, Emily and Orlando made a video on how to select the perfect sized rug and if you are a visual person (like me) it’ll help you see why these rules are going to help you find your match made in heaven: The Too Small, But Make It Work
“But EHD, I have a 5’x8′ vintage rug that goes PERFECTLY with my room. Can I really not use it?” Fear not made up reader! You can layer that beautiful vintage rug on top of a larger rug. Yep, it’s totally legal and can look awesome if you find the right pairing. The nearly no-fail way to attempt this is by choosing a natural jute-like rug as the large base and then layer a smaller rug (with a different color and material) on top. You can take a cue from Emily and Jenny Kayne from the photos above and place your smaller rug in the middle of the larger piece. But if you want to go even more rogue, you can off-center them as long as the front legs of your seating are on one of them. The Float (The Rule Breaker)
This layout is one that can look cool but you have to be careful. First, what does a “float” mean? Well, it means your rug is under your coffee table, but not your seating. I know, SHOCKING. 
Here’s the thing. If you have a truly great rug that only misses your sofa and chairs by a few inches then you won’t find us calling the rug police. We do recommend not letting the gap from your sofa to your rug be larger than 5″. Any more and it will really look too small and probably make you sad. The Sculptural Or Amorphous Float
Let’s get weird…with rug shapes. There are more options than just the classic rectangle. These types of rugs are great for awkwardly shaped rooms (like if you have a corner fireplace) and are easy to float and layer like Emily did in the mountain house living room.
Hot Tip
Layering a Cowhide or Sherpa Rug is a fun way to make a conversation area bigger. 
But there are no real rules for this one except make sure to buy proportionate to your sofa and have at least the majority of your seating’s legs on top of a part of the rug. So there you have it for our living room rug intensive. We, of course, wouldn’t leave you without giving you the proper materials to take with you. So below we have a little visual cheat sheet to help you decipher between all 5 of your options and then we have some shopping to do:) 
We know that large rugs can be expensive so we did a deep dive into finding the best of the best on the internet in three different price ranges. Happy shopping! 
1. Natural Moroccan Shag 9′ x 12′ Area Rug | 2. Black With White Stripe Rug 8’X10′ | 3. Ivory Paddle 9′ x 12′ Area Rug | 4. Ramona Geometric Flatweave Tufted Accent Rug 8′ x 10′ | 5. Hallu Fiesta Rug by Justina Blakeney® X Loloi 7’9″ x 9’9″ | 6. Chunky Knit Wool Woven Rug | 7. Black And Natural Grid Axel Area Rug | 8. NuLOOM Cotton Hand Loomed Herringbone Cotton Rug 9′ x 12′ | 9. Birmingham Black Woven Cotton Rug 8′ x 10′ | 10. Indra Rug 8′ x 10′ | 11. Ivory And Gray Wool Kilim Reversible Soho Area Rug | 12. Finesse Tower Court Rug 7’10” x 11′ 
1. Jamila Spice Rug by Justina Blakeney® X Loloi 7’9″ x 9’9″| 2. Souk Wool Rug 9′ x 12′ | 3. Jonathan Adler Inkdrop Slate Blue Rug 8’X10′ | 4. Plus Black/Cream Rug 8′ x 10′| 5. Zion Ivory Handwoven Rug 9’x12′ | 6. Guilford Navy Woven Cotton Rug 9′ x 12′ | 7. Aspen Rug 8’×10‘ | 8. Solana Navy Woven Cotton Rug 9′ x 12′ | 9. Topanga Teal Moroccan Rug 8’x10′ | 10. Hira Rug 8′ x 10′ | 11. Floral Blue Rug | 12. Casablanca Rug 9′ x 12′ 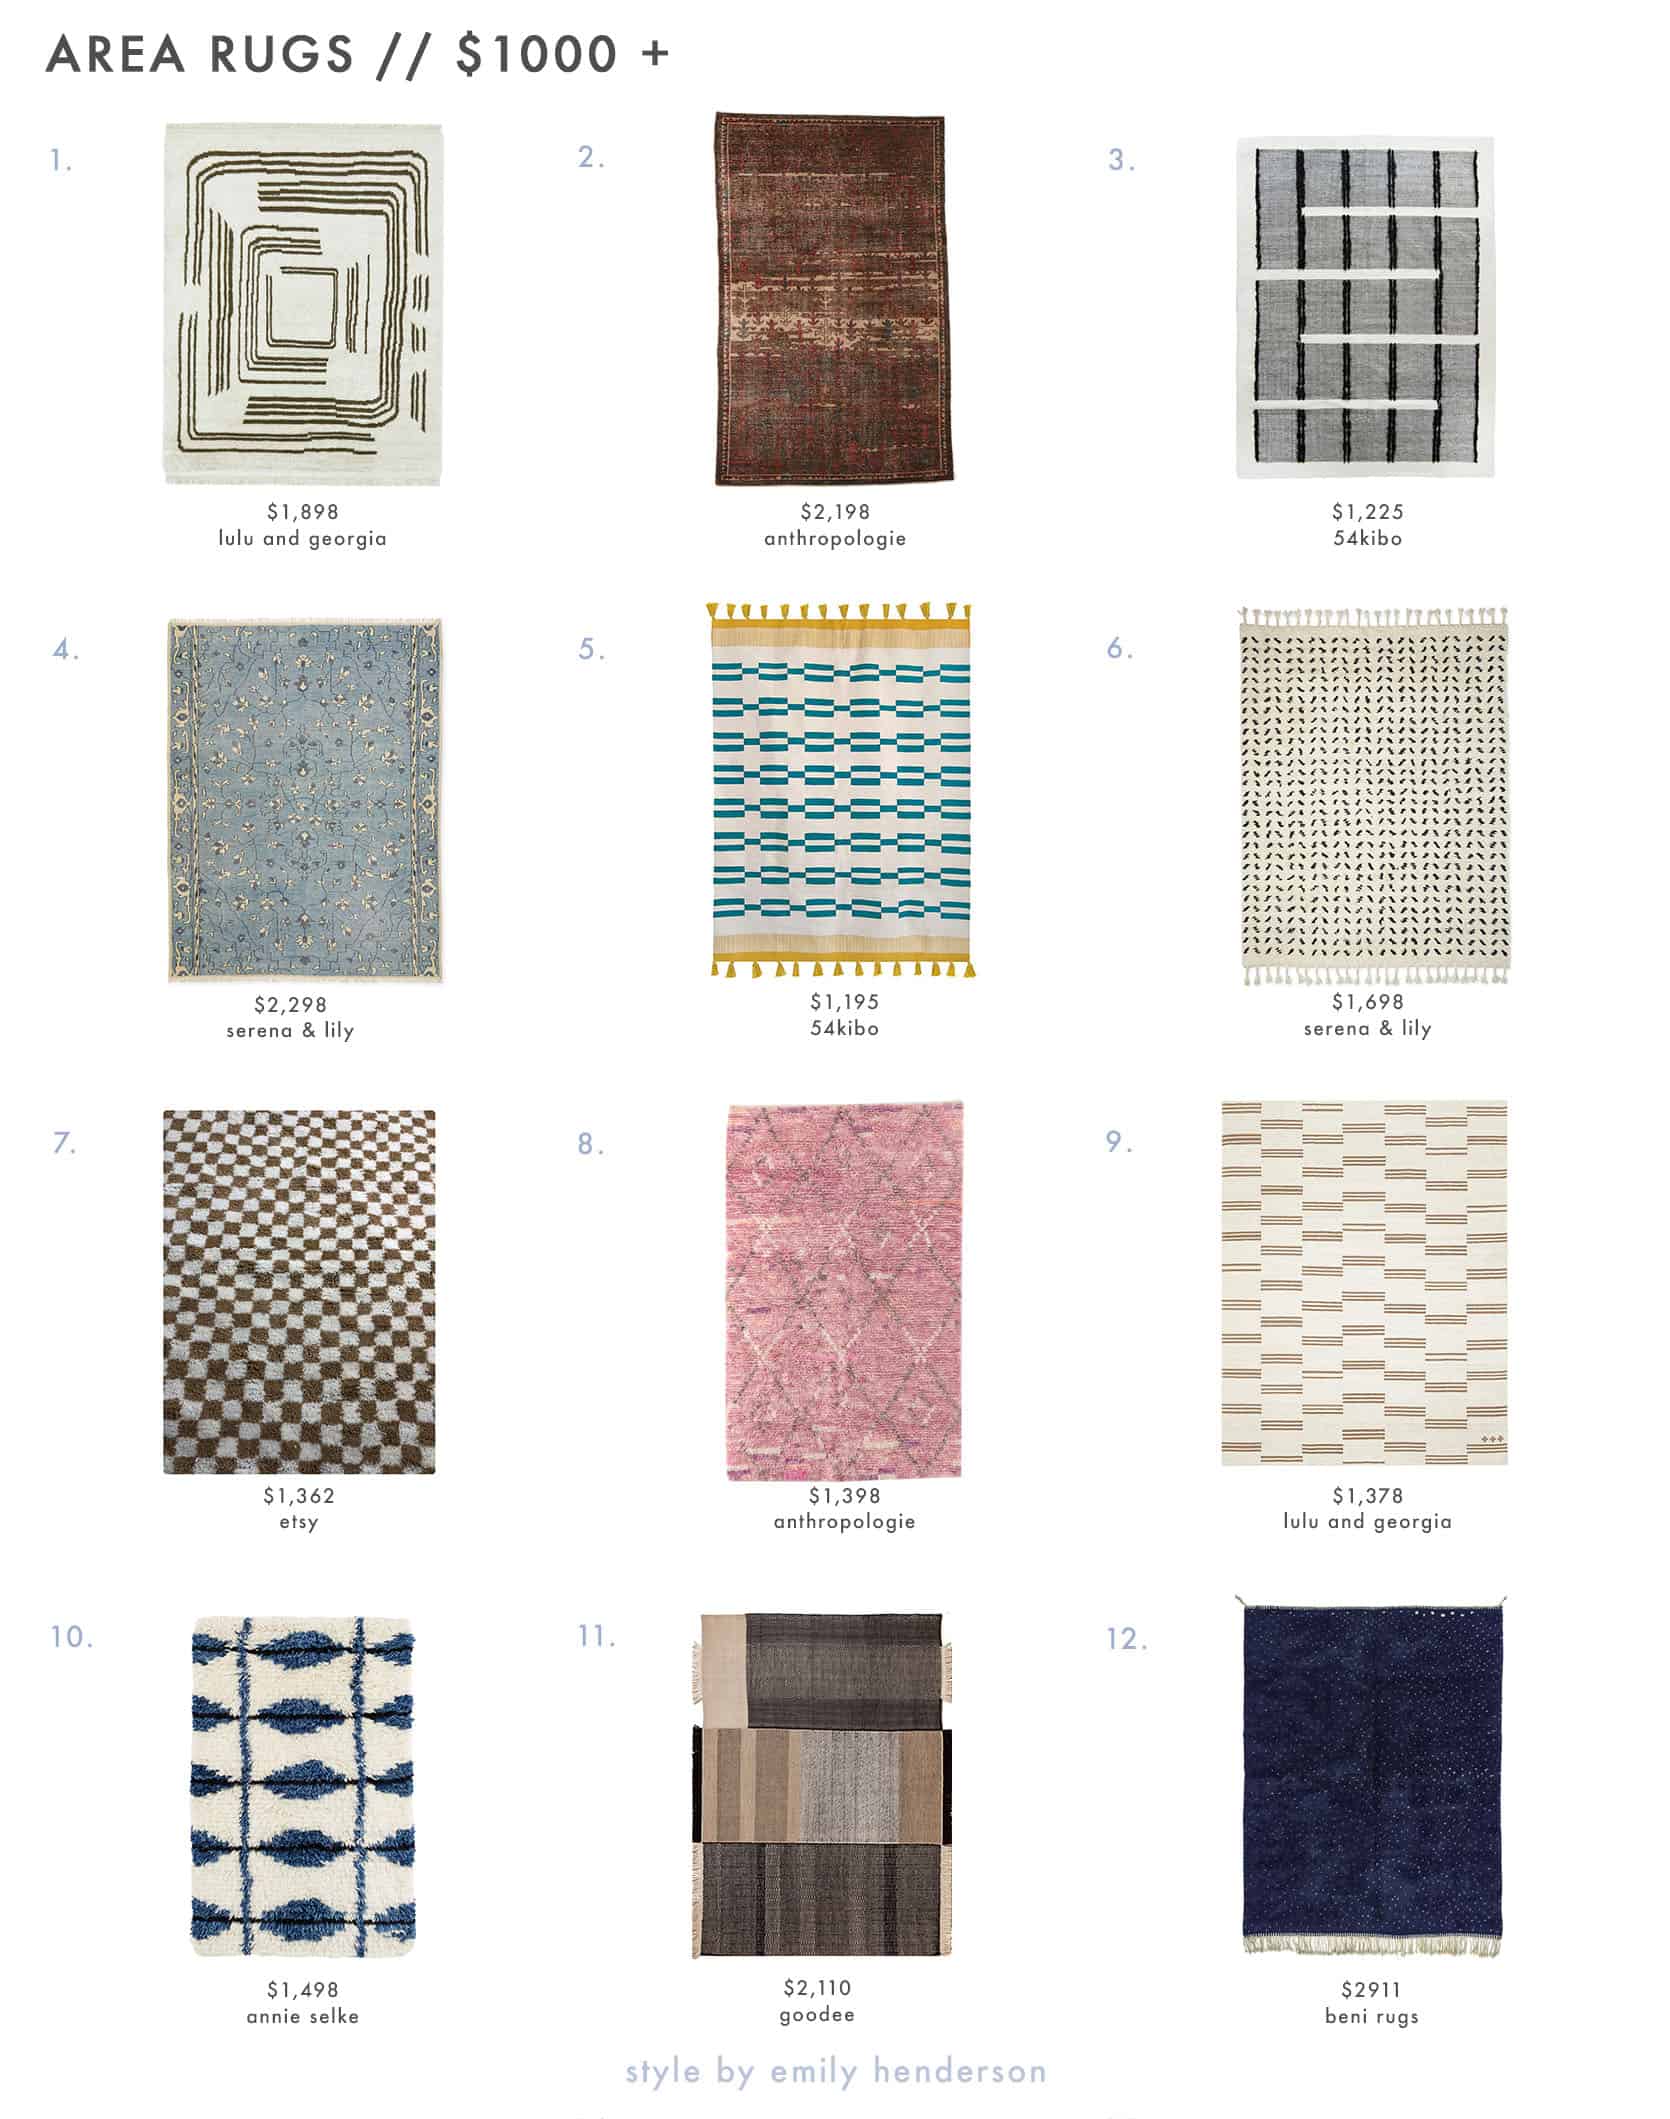
1. Earth Maze Moroccan Shag Rug 8’X10′ | 2. Amber Lewis for Anthropologie Hand-Knotted Sarina Rug 8’X10′ | 3. Serpentine Rug Wool 9’X12′ | 4. Winn Hand-Knotted Rug 8′ x 10′ | 5. Echo Rug 8′ x 10′ | 6. Huxley Rug 8′X10′ | 7. Large Moroccan Checkered Area Rug 9’X12′ | 8. Handwoven Priya Rug 8’X10′ | 9. Stripe Break Rug 9’X12′ | 10. Noma Indigo Woven Wool Rug 8’X10′ | 11. Tres Rug 7’10” x 5’7″ | 12. Dusk 8’X10′ Ok, that’s the real end. I hope you are now extremely confident and well equipped to pick out your dream rug and have it look exactly how you want it to. Let us know if you have any more questions in the comments. Love you, mean it. Opening Photo Credits: Design Sam Gluck | Photo by Alison Bernier | From: A Warm Scandi-Inspired Home The post How To Choose The Right Rug Size For Your Living Room – 5 Formulas Guaranteed to Work (+ 36 Shoppable Picks) appeared first on Emily Henderson. Originally from Emily Henderson https://ift.tt/2Q3eJLx 
What I love most about design (aside from the fact that it’s a literal joy for my eyeballs daily) is that there are so many moments that catch me off guard (in a good way). The antenna goes up is you will. That doesn’t mean that it’s always something brand new but instead, maybe it’s something I hadn’t noticed or fully considered before. Maybe it’s because it’s kinda a design rule that’s been broken which leads me to today’s topic: Floating Furniture That Normally Doesn’t Float (ie Cabinets and Beds). Yep. Off the wall and sometimes fully in the middle of the room. It was this Barcelona apartment tour that really shook me up! To be fair the apartment is a loft with high ceilings, large open spaces, and a ton of natural light. But architect, Benedetta Tagliabue, very cleverly sectioned off parts of her home with cabinets floating off of the walls and even in the middle of the room as you can see below. 

Her home is full of so much personality, pattern, and texture that you don’t feel like you are in a museum or art gallery-like home, just a really thoughtful and exciting one. 
But then again maybe we don’t knock the museum-esque look? I mean check out that glass cabinet above. It really helps to separate this very open concept space into a couple of lovely zones which was the designer’s goal. Also, I’m pretty in love with those curtains and the half solid and full sheer double look. But back to the cabinet. Would this delicate cabinet be ideal in a house with children, a rambunctious pet, and/or a terribly clumsy adult? No. BUT it’s a pretty cool and interesting idea that I’m inspired by. 
Not to mention that the HOT design question of 2020 was asking if the open concept home was done. Personally, I don’t think it will ever be gone, gone but adding in a large cabinet like the one about that gives the illusion of a private space, but the airiness of an open concept is kinda a great idea, right? It also looks like the far side of the cabinet opens up to both sides. Also, great! 
Now the photos above and below fall more in the “half float” category for me since they are touch two surfaces but I love them just the same. Open shelving is such a great way to create a design moment with books and objects but using it as a “room divider” in the middle of the floor is extremely cool. Again, creating “zones” that still make a space feel connected and light. 
See it’s a half wall that doesn’t cut off the space but makes it a little cozier. 
But I also love how ezequiel and maría just put this free-standing cobalt freaking blue shelving until in the middle of the floor. It makes a very cool statement, draws your eye up, and there’s something interesting to look at from every side. So that’s my “hey if you have the space, float a cabinet off of your wall as a zone creator and design rule breaker. It might be really awesome.” But now we move onto the other unlikely floated furniture piece…the bed. Can you imagine??? Well, Hilton Carter’s incredible nursery for his baby girl was the second *ding* in my “are people floating all of their furniture now” thought. Also, yes that is a custom handpainted mural with a unicorn and dinosaur… this little lady is SO lucky because her parents are extremely cool. 
And maybe I’m wrong but I feel like I haven’t seen a ton of “crib in the middle of the room” designs but I LOVE it. A tiny baby that can’t yet walk doesn’t actually need open play space. I’ve also done a lot of babysitting in my years and they are either in your arms, in some kind of chair, or just in the living room on the floor. So why not just do something cool and put that crib in the middle of the room? But this look isn’t just for babies with rad parents! It’s for rad parents and any other person with a large enough room too. 
This is a catalog shot but tell me this isn’t cool?! It feels so wild but all you are doing is moving your bed a few feet from the wall. So it’s a free idea that might make you the coolest kid in town. But I know what you’re thinking. What about an outlet for side table lamps and phone chargers. Well, it’s basically the same as when you float a sofa. Either you get real fancy and put an outlet on the floor which will cost you. OR you can cut a little slit in your rug and run in under there to the wall. Problem solved. 
Our design bud, Max Humphrey, was an already established cool kid but now it’s officially confirmed with this floating bed in this beach house he designed for one of Emily’s best friends! I know it’s hard to tell that it’s floating but Emily stayed there, so we definitely know. Minimal, chic and perfect for a vacation home. 
What I love about this version is that the best is super tall! At first, I was of the opinion that low beds were the kind that only really worked with this look but I was wrong. This four-poster bed is awesome and I dream of waking up in it and looking at what is likely a very stunning view. 
Here’s another catalog shot but really who cares if it’s inspiring. Pluuuus it’s from Amber Lewis’ new line at Anthropologie! I personally LOVE this chandelier, these wine glasses, this chair, and this piece of art. But there really is something airy and wonderful about this bed floating in the middle of room. Gimme all that breathiness. 
Now, if Nate Berkus is down for the float I think that REALLY says something. It’s also a great way to add some unexpected storage. Nate did under the bed drawers AND has some storage on the other side of the headboard. Cool, no? 
Then we have another huge bed (did you ready Caitlin’s canopy post?) where this look is perfect. This room also looks like it has a ton of doors and windows so floating might have really been the only option. That’s definitely an option if you also struggle with too many doors and windows (and have a large enough space). Now, are you ready for the even cooler part?… 
LOOK AT THOSE shelves! And the curves! And the feet!! It’s such a cool design that’s super functional too. Doing this might also make you feel a little less like you’re floating in space if that’s a concern:) Ok, so what do you think. Are you into the idea that any piece of furniture can float?? Do you like this idea/trend? Hate it? Let’s chat! Love you, mean it. Opening Image Credits: Design by Amber Interiors | Photo by Shade Degges | via All Sorts Of The post Should We Be Floating All Of Our Furniture??? A Potential Trend We’ve Think Is On The Rise appeared first on Emily Henderson. Originally from Emily Henderson https://ift.tt/2UHhoQu 
This last year made a lot of people I know reevaluate their jobs. There seems to be this collective urge to actually enjoy some of the 40-50 hours a week we spent at work. Many were laid off, many had to quit or scale back to be with kids when they weren’t in school, and for some more privileged it’s just an existential shift. I’ve had this massive influx of people asking me lately about how to get started in a creative career. Five years ago I wrote the below post based on a couple of keynote speaking engagements that I had just given and after rereading it I figured with some updates it’s actually still very applicable. So if you are toying with starting a creative career, if you secretly really want to take the risk but you are scared or you are having trouble pulling the trigger, this post could be helpful. 
Now I’m not a professional motivational speaker; furthermore, I’m actually someone who has made 1 million mistakes in my business, but as far as putting myself out there? I did that and I continue to do that which I think is one of the reasons for the success of my company. But those of you who are hesitant are certainly not alone. I find this especially among my generation. Millennials are much more entrepreneurial and confident than those of us who went to college in the 90s likely because we were raised pre-internet and didn’t see firsthand how you could actually make a living being an artist. What I see most in people that aren’t fulfilled creatively or career-wise is the inability to pull the creative career trigger – to put themselves, their service, or their product out into the world. This inability holds them back, keeps them unfulfilled, and deprives them of much-needed creative expression. And it’s such a cycle – the longer you wait, the less confidence you have, right? Because you see all these other people starting all over the place and you think, gah, I’ll never catch up!! It’s sucks, I get it. But why? My theory is that this lack of “starting” is attributed to two stupid things: perfectionism and fear. Perfectionism is a dangerous demon, and trying to capture it in any facet of your life (career, relationship, or even design of your new English cottage kitchen, for instance) is a fool’s errand that will cause you so much stress, make you less happy and no matter how hard you try, you will still fail to be perfect. So stop trying!!! Sure, I believe in being detail-oriented and having a high level of quality in both styling/photography and my design work. However, as everyone who works for me or knows me knows, I’m truly not a perfectionist and I think this is one of the keys to creative success – especially in the digital age. I believe producing something good is more important than perfecting something ’til death. I know that it’s hard if you ARE a perfectionist, and I’m not a psychologist but it seems to me that perfectionism was touted as some sort of good quality – like being a workaholic – so many people identify with it (by the way it is an actual disorder for some people) but ask yourself if you are truly a perfectionist or is it just an excuse because you are scared. What I hear the most is that someone’s product or service isn’t quite ready to be put out there. Maybe it’s that their font isn’t flushed out on their site yet, or their portfolio isn’t robust enough, or perhaps their product needs a few tweaks. But this tweaking/obsessing/flushing out process can go on for years. YEARS of you not starting and therefore not feeling fulfilled. 
Fear Is Even Worse.I get it. I’m held hostage way more by fear than perfectionism. I’ve told you over and over that there are some posts of which I’m terrified to push publish. Fear of criticism, backlash, or negativity is something I still battle a bit on personal posts and I have to really force myself to be brave and power through (luckily most of you are really nice). But I see what fear does to people – it totally paralyzes them and stops them before they ever start. Just remind yourself what I tell myself all the time – the worst thing that can happen is you fail, and failure doesn’t actually kill anybody. No one will die if I blow this speaking engagement. No one will die if I reveal a project that I, too, fear is sub-par. No one will die if I start a design series for the blog that you guys all think is insane. I’ll simply adjust and move on. In the digital era, people forget so much faster than they used to and I promise you, you have many chances at a first impression. So here’s my advice to “getting started”: 1. Focus On QUANTITY Over Quality For A While.This is KEY and opposite of what we have always been told. When I started the blog it looked like this. 
It was barely above average at best and I knew it but I had put off starting the blog for over a year at that point and one day I just needed to push publish (I have hasty little sausage fingers that often just press send when my brain is busy trying to deal with fear – thank god my fingers are much smarter than my brain). The inspirational photos were pretty but not perfect, the copy was personable but not even that professional, and the site itself was absolutely mediocre at best. I had built it by myself on Blogspot with zero photoshopping skills and a serious frustration towards choosing fonts (which I still have – I’m strangely bad at 2-dimensional design). 
But I started. Sure, this was in a time when there weren’t that many blogs and the content was mostly inspirational photos scanned from magazines or DIY projects with bad cameras and even worse lighting. As I started to create content in my home I didn’t obsess on perfection either and instead created cute vignettes that had personality and partnered with up-and-coming photographers who needed to practice their craft, too, to shoot random stuff in my house. This is how I created a portfolio and a blog and while neither were perfect, I did it. I started. 2. Create A Website With Your Company’s Name That Says “Coming Soon!”Add your contact/social media handle – then get on social media instead while you “tweak” your site (you could tweak your site for a year, meanwhile “not starting”). It’s so easy. People accept a “coming soon” website for months, I promise. 3. Start Posting On SocialIf you want to be a potter but are intimidated by creating so much social media content or Instagrams every day then simply find photos of pottery that inspire you and post them, obviously crediting the artist. Say something like “So inspired by @BenMendansky’s work – I love how graphic his mugs are and it’s making me get back into the studio this morning. Just add coffee.” Then tag him (which will get his attention). You don’t have to create all your own original social media, you just need to CREATE SOMETHING and then remind people that you, too, are creating something. Pretty photos = likes, and likes = more followers. I used to only put original photography on social media but since I’ve been promoting other people’s work I’ve seen a huge amount of success as they feel flattered and followers love the inspiration. (2021 update: I’m currently on the fence about posting a lot of other people’s work that work in your field as many people don’t read the captions so they can easily just think it’s yours. However, it’s more important to create the account which allows people to tag you. So many times I’ll be at a store and see something that I love and want to tag it, knowing that my follower count is super high and could definitely lead to them having more business, so when they don’t even have an account I get so bummed for them). Put their work on insta-story and tag them there – it’s a more appropriate place to show who inspires you and looks less like YOUR portfolio. 4. Use Your Facebook/Instagram Friends As Your Focus Group.These are people who probably care about you and want you to succeed so ask their opinion so they will help you promote and might give you the feedback/encouragement you need. Over the weekend I was talking to Maxwell (founder of Apartment Therapy), Justina (Jungalow), and Jaymie Derringer (founder of DesignMilk) and all of us chatted about our lack of perfectionism and our instinct to just “create and present” rather than “create and obsess.” I was glad it wasn’t just me – they absolutely ditto’d this theory. Done is better than perfect. 
What Happens When You Finally Start? These Four Things:1. You practice your craft and get better. For me, it was writing, styling, and posting to social media. I had a moderately distinct voice when I started but I’ve certainly honed in on it over the years by writing every. single. day. Like an athlete with a muscle, just exercising guarantees progress if not success. You have to practice your art whether it’s making pottery, interior design, writing, etc and by putting it out there you are forced to practice again and again and again and every day you’ll get better and better. 2. You receive feedback. The internet is one big free focus group – AT YOUR FINGERTIPS!! Companies used to (and some still do) pay so much money to show a product to a group of randomly selected people to get their arbitrary base thoughts. Now you can ask your friends/followers on social media and you will know how people feel about your product immediately. Yes, this is terrifying. One time somebody told me that my designs looked like a child had smeared shit all over their walls. He apparently really, really didn’t like my work and my decorating style apparently angered him A LOT. But most of the time that feedback is absolutely helpful. A few years ago I was getting a lot of feedback that my work was starting to look all the same and as I looked at it, like an objective reader I realized they were right and I started to diversify. If you want faster results and more engagement then ask a question. You can say something like “Excited to finally start showing off my work, but I need feedback – should this mantel have more personality or is it already full enough?” Or if you are a maker you could say, “Thinking about opening an Etsy store (coming soon!) and wondering what price point you would spend on one of my hand-thrown pots?” If you don’t have a social following then ask your Facebook friends. If you aren’t on FB, then get on Facebook (and Instagram). You don’t need to make a huge announcement that is like “HEY WORLD, I’M NOW GOING TO CALL MYSELF AN ARTIST AND HERE ARE 147 PAINTINGS FOR YOU TO PURCHASE.” No. Baby steps are good! Create one product or publish one project, and ask for feedback – honestly, this will probably make you feel really good. As you get feedback you can tweak your product or service and make it better. Maybe everyone overwhelmingly says that things feel too busy, or that you need more color – then you know what the market is feeling and if you want to listen (p.s. you should) then you will probably create a product that will be more successful. 3. The third thing that could happen if you put your work out there is that you just. might. succeed. No one can buy a product they don’t know exists and no one will hire you for a skill that they don’t know you have. What if you start creating, putting it out there and it turns into your dream job?! You simply won’t know until you start. That’s my Monday morning wanna-be-Ted-talk for you. Maybe an Em-talk? Charlie just slapped me (deservedly) for writing that – he’s very sensitive to self-righteous know-it-all advice-givers. But here’s the part where I encourage you to START and I selfishly want to be part of the process. So if this motivates you at all, please post on social and tag me in your project/art/creation by using this hashtag #EHDjuststart. Our web-based world is always ready for more makers, creators, and artists. And with the internet being such an easy and accessible platform for all services and products, you, my friends are in the perfect time/era to put away that “How to obsess over everything and make sure it’s perfect” self-help book and instead, JUST START. Opening Image Credits: Photo by Stephanie Todaro | From: How To Create A Design Plan The post My Four Cents On Starting A Successful Creative Career appeared first on Emily Henderson. Originally from Emily Henderson https://ift.tt/3j8j2UI 
It’s hard to know what to write when there’s so much tragedy and hardship going on in the world. We don’t want to ignore but also know that a momentary pause, like a link up, is also needed. So please give your loved ones an extra hug, enjoy some fun things we are loving, click on the links to help those in need, and have a good rest of your Sunday<3 This week’s house tour might be the coziest modern cabin we’ve seen in a minute. It’s textured, warm but with just the right amount of soulful contrast. And if you are in Australia you can rent it! From Emily: At the beginning of the pandemic I ordered 10 different activity books for the kids since we were homeschooling. Everything from science experiments, cookbooks, cooking + science, craft books, and activity books and this was by far the most popular for the whole family. All of the crafts are from recycled materials that you likely go through (cans, egg crates, yogurt cups, bubble wrap, cardboard) so we started washing and collecting them in the garage in a big tub so that when we wanted to do a craft we wouldn’t have to actually buy more supplies. The book is super well shot, the crafts are clever, easy, fun and doing them with the kids was something that I equally enjoyed doing (spoiler – I love to craft). So while school is ramping up and you might not need the extra entertainment I highly recommend this book for rainy weekends or if you want to do something to engage with your kids after school that you might actually enjoy, too. Another “home tour” this week is the beautiful La Bionda Hotel in Begur, Spain. The design is by Quintana Partners and has an old-world flare with whimsical detailing. Every inch of this property is absolutely STUNNING, and it’s now on our bucket list of well-designed hotels to stay in. Oh, and the bright red lobby desk is holding onto our hearts tight. Check it out, you won’t be disappointed. From Ajai: I like to make any space I design feel grounded, so incorporating pots and plants is a good way to do that. I love these clay vessels because of their distressing, giving them an antiqued feel. From Mallory: I don’t know why it took me forever to order this for my apartment, but after a year of living here I FINALLY DID IT and life is good. Yes, they’re door stops. The doors to our apartment are very heavy & shut behind you, but we like to keep them open to get a cross breeze while we cook so we don’t set our smoke alarms off. We used to drag an extremely heavy chair across the entire place just to keep the door open, but now that I finally got some door stops, there will be no more chair dragging and it’s much better for everyone (especially our neighbor under us). Plus I like these because they have a cute little leather tab that adds a nice touch. Best $10 (for a 2 pack) I’ve ever spent. Also from Mallory: I just stumbled upon these extremely cute Etsy lights and I want them all so bad. From Jess: If you haven’t watched Bake Squad I HIGHLY recommend it. It’s fun, uplighting, and just full of an insane amount of creativity from professional bakers. Also From Jess: Ok I know it’s not fall yet and crowding around the fire is NOT top of mind but I picked up this very good log holder from Target. It’s perfectly simple and modern AND has a removable base plate to easily clean up messes. I’m planning to use it in a slightly unconventional way so it can be used in more ways than one! From Caitlin: Greetings from Vermont! I’m doing MOH duty in my childhood best friend’s wedding this week – over two decades of friendship!!! – but I GOTTA show y’all something one of the other bridesmaids turned me on to: this volumizing round brush blow dryer. Guys, this thing is AMAZING at getting you some blowout-style hair without the hassle of juggling a brush AND dryer separately. She let me borrow it on our very cold, very damp bachelorette trip to upstate NY and I used it again this week in a super-rainy and uber-humid climate – and y’all, I’m just BLOWN AWAY (pun UNintended but very appropriate) by the difference it makes in how smooth and shiny and bouncy my hair looks and feels without any additional hot tools. Highly recommended!!! We all know this has been a very hard week. Emily wrote this post about the ways we can all help the Afghan people and the refugees that are here and coming. But we can’t forget about Haiti and the horrible earthquake that has devasted it. Here’s a great article from NPR that gives a bunch of ways to help and/or get involved. That’s all for this week folks!! Thanks for tuning in Opening Image Credit: Design by Emma O’Meara | Photoy by Nikole Ramsay | via The Design Files The post The Link Up: How Caitlin Makes Her Hair Silky/Bouncy/Smooth, Emily’s Favorite Kid Craft Book, And Some Ways We Can Help Those Who Need It Most Right Now appeared first on Emily Henderson. Originally from Emily Henderson https://ift.tt/3y4VYKJ 
Two weeks ago, the EHD team met up in person one final time before Em’s move to Oregon. We rented a house in Long Beach for three days, ate two bags of tortilla chips, drank Palomas prepared by Jess (amazing), tested out a bottle of mango-flavored wine margaritas (significantly less amazing), and planned out our schedule for the rest of the year. (I also got food poisoning after a dinner and Mallory had to take care of me in the middle of the night, because the one thing EVERYONE dreams of is vomiting loudly and in front of all of their coworkers after spending a year apart.) But during all of this fun, we also made time to check out two of our all-time favorite vintage spots in the Los Angeles area: the Long Beach Antique Mall (#2 – #1 is no longer open) and Urban Americana. Both are filled with incredible booths stocked by super talented vendors, so there are a TON of treasures of all types to be found. In true vintage lover fashion, I wanted to force the team to do a little show-and-tell because it was SO FUN seeing the things that caught their beautiful design-minded eyes…so today, we’re here to take you on a little vintage shopping team with EHD. I gotta know – would you have taken any of our picks home? Do you like our purchases? We’ll obviously kick it off with the big boss, since we all know she’s your favorite Emily
UGH. just seeing this chair again makes me sad that I didn’t get it. At the time it was a “no” because it was $250 and I wished it were $115. But I knew it was a “photoshoot” chair, something I’m not allowed to buy anymore because I have enough dumb photoshoot chairs. Photoshoot chairs can be defined as sculptural chairs that people avoid sitting in because they aren’t that comfortable. It’s a stylist addiction that I’m trying to cure myself of because it’s dumb. Sure, I’ll always have my hand chair, and if this chair were $35 there is NO WAY I wouldn’t have hoarded it for the corner of a bedroom, but for $250 it felt high, then I’d have to drive it to Lake Arrowhead, look Brian in the eye, defend a week before we are moving states into a rental with a storage unit full of furniture I felt the need to buy an expensive sculptural chair… Remember, “if its not a hell yes, it’s a no”. But please if you buy it tag me on social so I can see it. The shape is rad, but there were some pieces that were coming off of it making it go more into the “thrifted” realm and less “vintage” (and $250 is too much for that IMHO). I’m currently not allowed to buy any more pictures of dead people because I have probably 10-12 from our LA house that are awaiting their spots at the farm, but I did love these two. I mostly love the outfits – the historical signifiers of the time. And yes that blonde girl reminded me of Birdie (and yes, myself). The boy portrait was I think $1200 or something crazy expensive but it was HUGE. I CAN’T BELIEVE I HAVEN’T TOLD YOU YET. Birdie, my sweet little joyful lady is obsessed with decorating and styling (it redefined for me what parenting joy is – I know she is obviously heavily influenced by me, but she does it all the time by herself when I’m not in the room). Anyway, we have this dollhouse from Target that is up in the attic and she finally BEGGED me to get it down last week because she is ready to start decorating it. Two or three years ago I begged her to do this with me, but she was too young and didn’t get why it was fun. Now I’m still hesitant to confirm that she’s in it for the long haul, and not that she just wants to play with a toy on the top shelf for a brief period, but crossing fingers we’ve entered into the “playing dollhouse” together mode. Hot Tip – you have to have dolls. While she does love decorating she is into the imaginary interaction part of it. That’s all to say I didn’t buy this dollhouse furniture because it was two days before she said she was ready to go for it, but I wish I had. Two mirrors because somehow I can justify moving these up to Oregon. The one on the right I love for a gallery wall (the sculptural shape breaks up normal rectangles). I think it was $75 which is probably more than I should have paid, HOWEVER (rationalization coming here) the one on the LEFT was only $20 and I would have paid $60 for that (imagine leaning on our kitchen shelf – that arch is so cute and you know we love a mirror in a kitchen). Two vases that I did not need… I bought the one on the left because that texture is cool, and white over navy is obviously going to work in any room of our home. The footed black one is good, but I have 932 vintage footed vessels so I slowed my roll. 
If we were closer to decorating the farm I think I would have snagged some of these, but since we are like 7 months out and I KNOW that the antique shopping in Oregon is incredible I decided to wait. I do love this tole lamp for Birdie’s room (she loves flowers possibly even more than I do) but not having designed anything for their rooms yet (not even knowing if they are sharing or not) I decided it was an expensive hoard ($140 I think). Two more paintings that I was drawn to, but not enough to buy. The needlepoint on the left really struck me, well, that particular day felt like the world needed more kindness. I skipped it because it was kinda expensive and it just generally wasn’t a “hell yes”. The strawberry still life next to it I’m still super into and kinda wish I had bought it for our pantry (I love those colors A LOT) but again, I wasn’t 100% and it was $60 so I decided to skip it. 
I kinda don’t want to even tell you this yet, but there will likely be a piece of furniture or two upholstered in vintage quilts. I’ve been scouring all the vintage sites and I know which ones I’m following (they are super expensive, like $250 +) so I’m waiting to scour in person. These two were CLOSE but the blue is just a bit too bright – I want something either more muted or more gray. But I was really drawn to the simplicity of the pattern and couldn’t stop thinking about how cute it would be to have one of each on the foot of the kids’ beds. But again for $180 each it felt too risky since I don’t know anything about their rooms yet. Besides, I need an excuse to go antiquing up there… Oh. remember the time that I actually freaked out at a thrift store in Pasadena when I found the most perfect red and white antique quilt (king-sized!!) for $80 and bought it SO FAST, almost like the cops were going to come in and shut the place down because the deal was so good. Then I got it home and upon further inspection realized it was from Pottery Barn???? I use it all the time, actually – it’s our go-to picnic blanket. Remember the “antique french twine spool holder” I realized later was from Home Goods?? There is really no avoiding this trap (except actually inspecting your vintage goods) and it still cracks me up. Now I’m not FULLY convinced of either of these, but I was very drawn to them. The boat is so pretty and simple – if we had a beach house I would have 100% bought it. The shell pot? I don’t know. I just know that they are having a moment but aren’t for me. They have an awesome “Golden Girls” vibe that I could 100% see on Instagram. 
I was tempted by this chair because I’m in need of two swivel chairs (I think) and this one was cute and affordable ($140). But ideally, I’d have a pair of them and finding single dope chairs is my forte so I skipped this one. It was at Urban Americana (which is awesome BTW) if you want to go snag it. Jess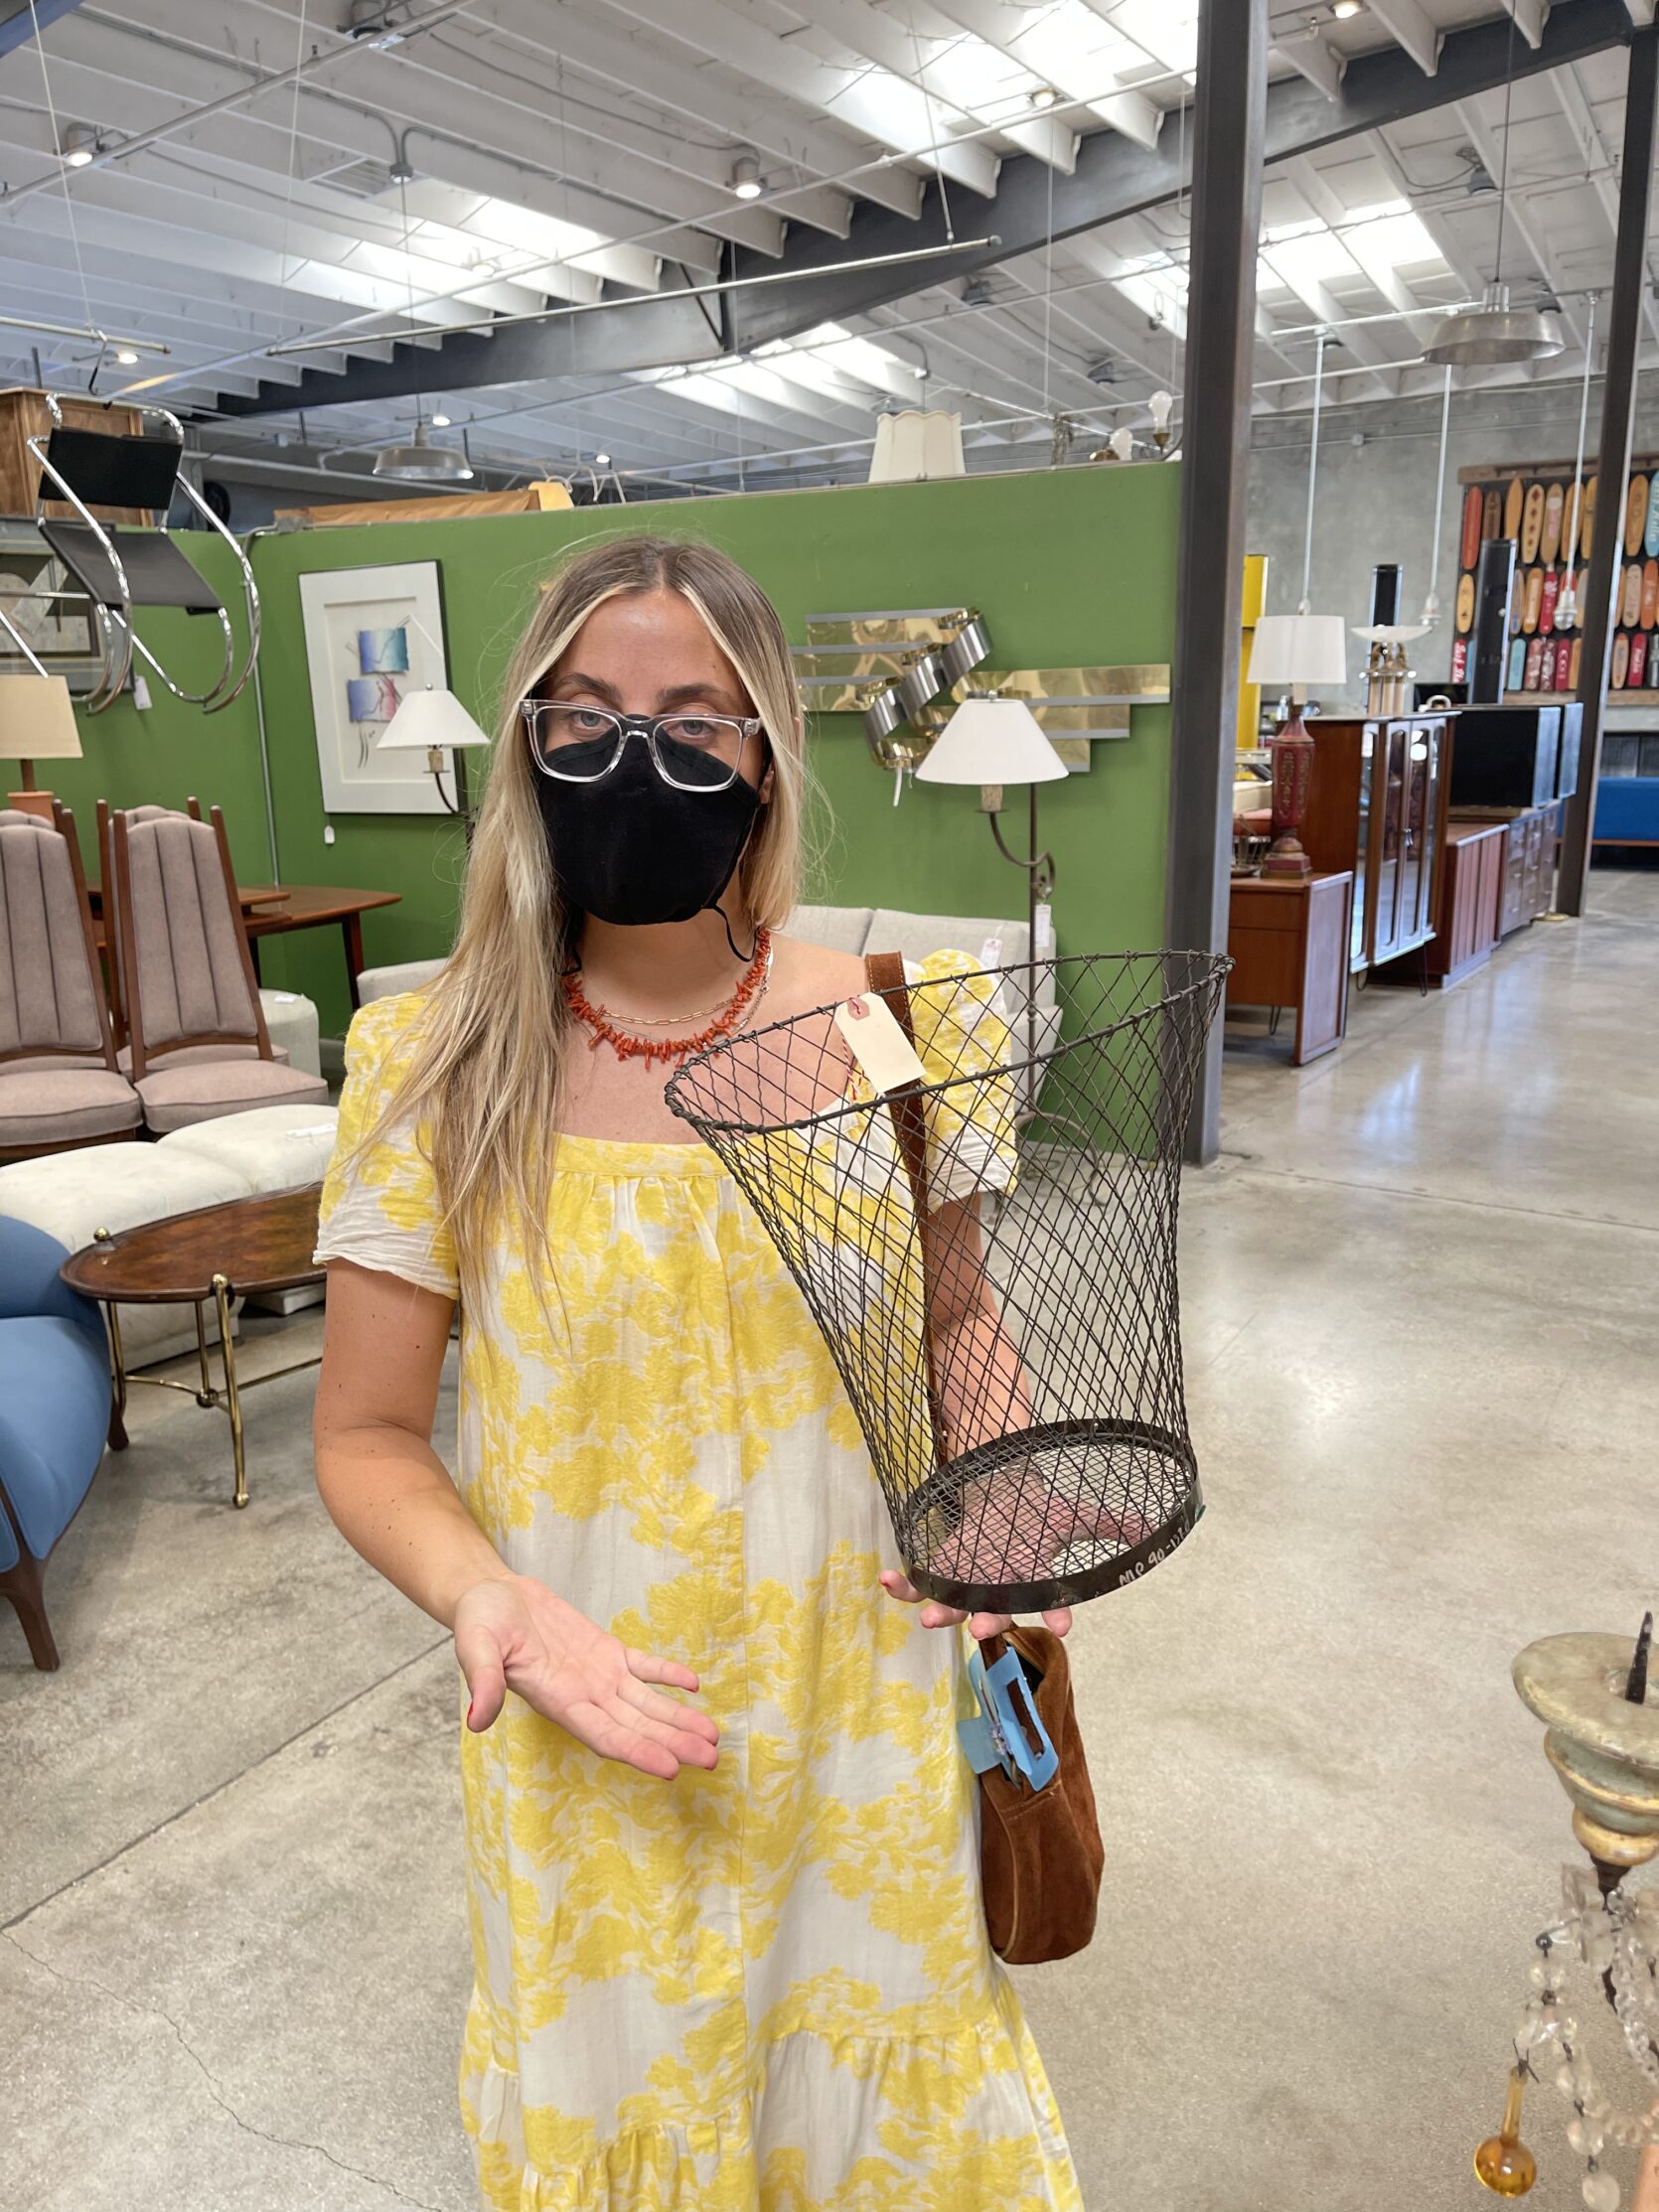
Just a gal in her very yellow “Polish grandmother” dress contemplating purchasing yet another cute trash bin. I already own two so I didn’t buy this one but shoot it’s SO CUTE, right!? I reeeeeallly love a lightly patina’d delicate wire…anything. So this bin was no exception. I personally think an unexpected, chic trash bin is the way to up the ante of any room’s style:) But actually. I’m not joking. Don’t forget about the trash. It took A LOT of restraint not to buy at least one of these. I’m very drawn to dark wood these days and I think it’s because of the style of my apartment. So even though that mirrored curio shelf was only $20 I passed because I didn’t have a place in mind for it. Same goes for the circa 1880 corner cabinet. Except that one was $85 so much more of a financial investment. Maybe next lifetime. EM HERE -THE ONE ON THE LEFT IS SO GOOD!!!!!!!!!! I WOULD HAVE TOTALLY BOUGHT THAT FOR OUR POWDER BATH!! That corkscrew and matchbook caught my eye but even at $12 and $10 I decided to skip. I definitely hopped on that “framing a bunch of cool matchbooks” trend in 2008 and I still always peek at fun ones when I’m thrifting. I honestly still love the look and may even do it again! I still have all of them:) GAH – EM HERE – THAT CORKSCREW IS SO GOOD!!!!! 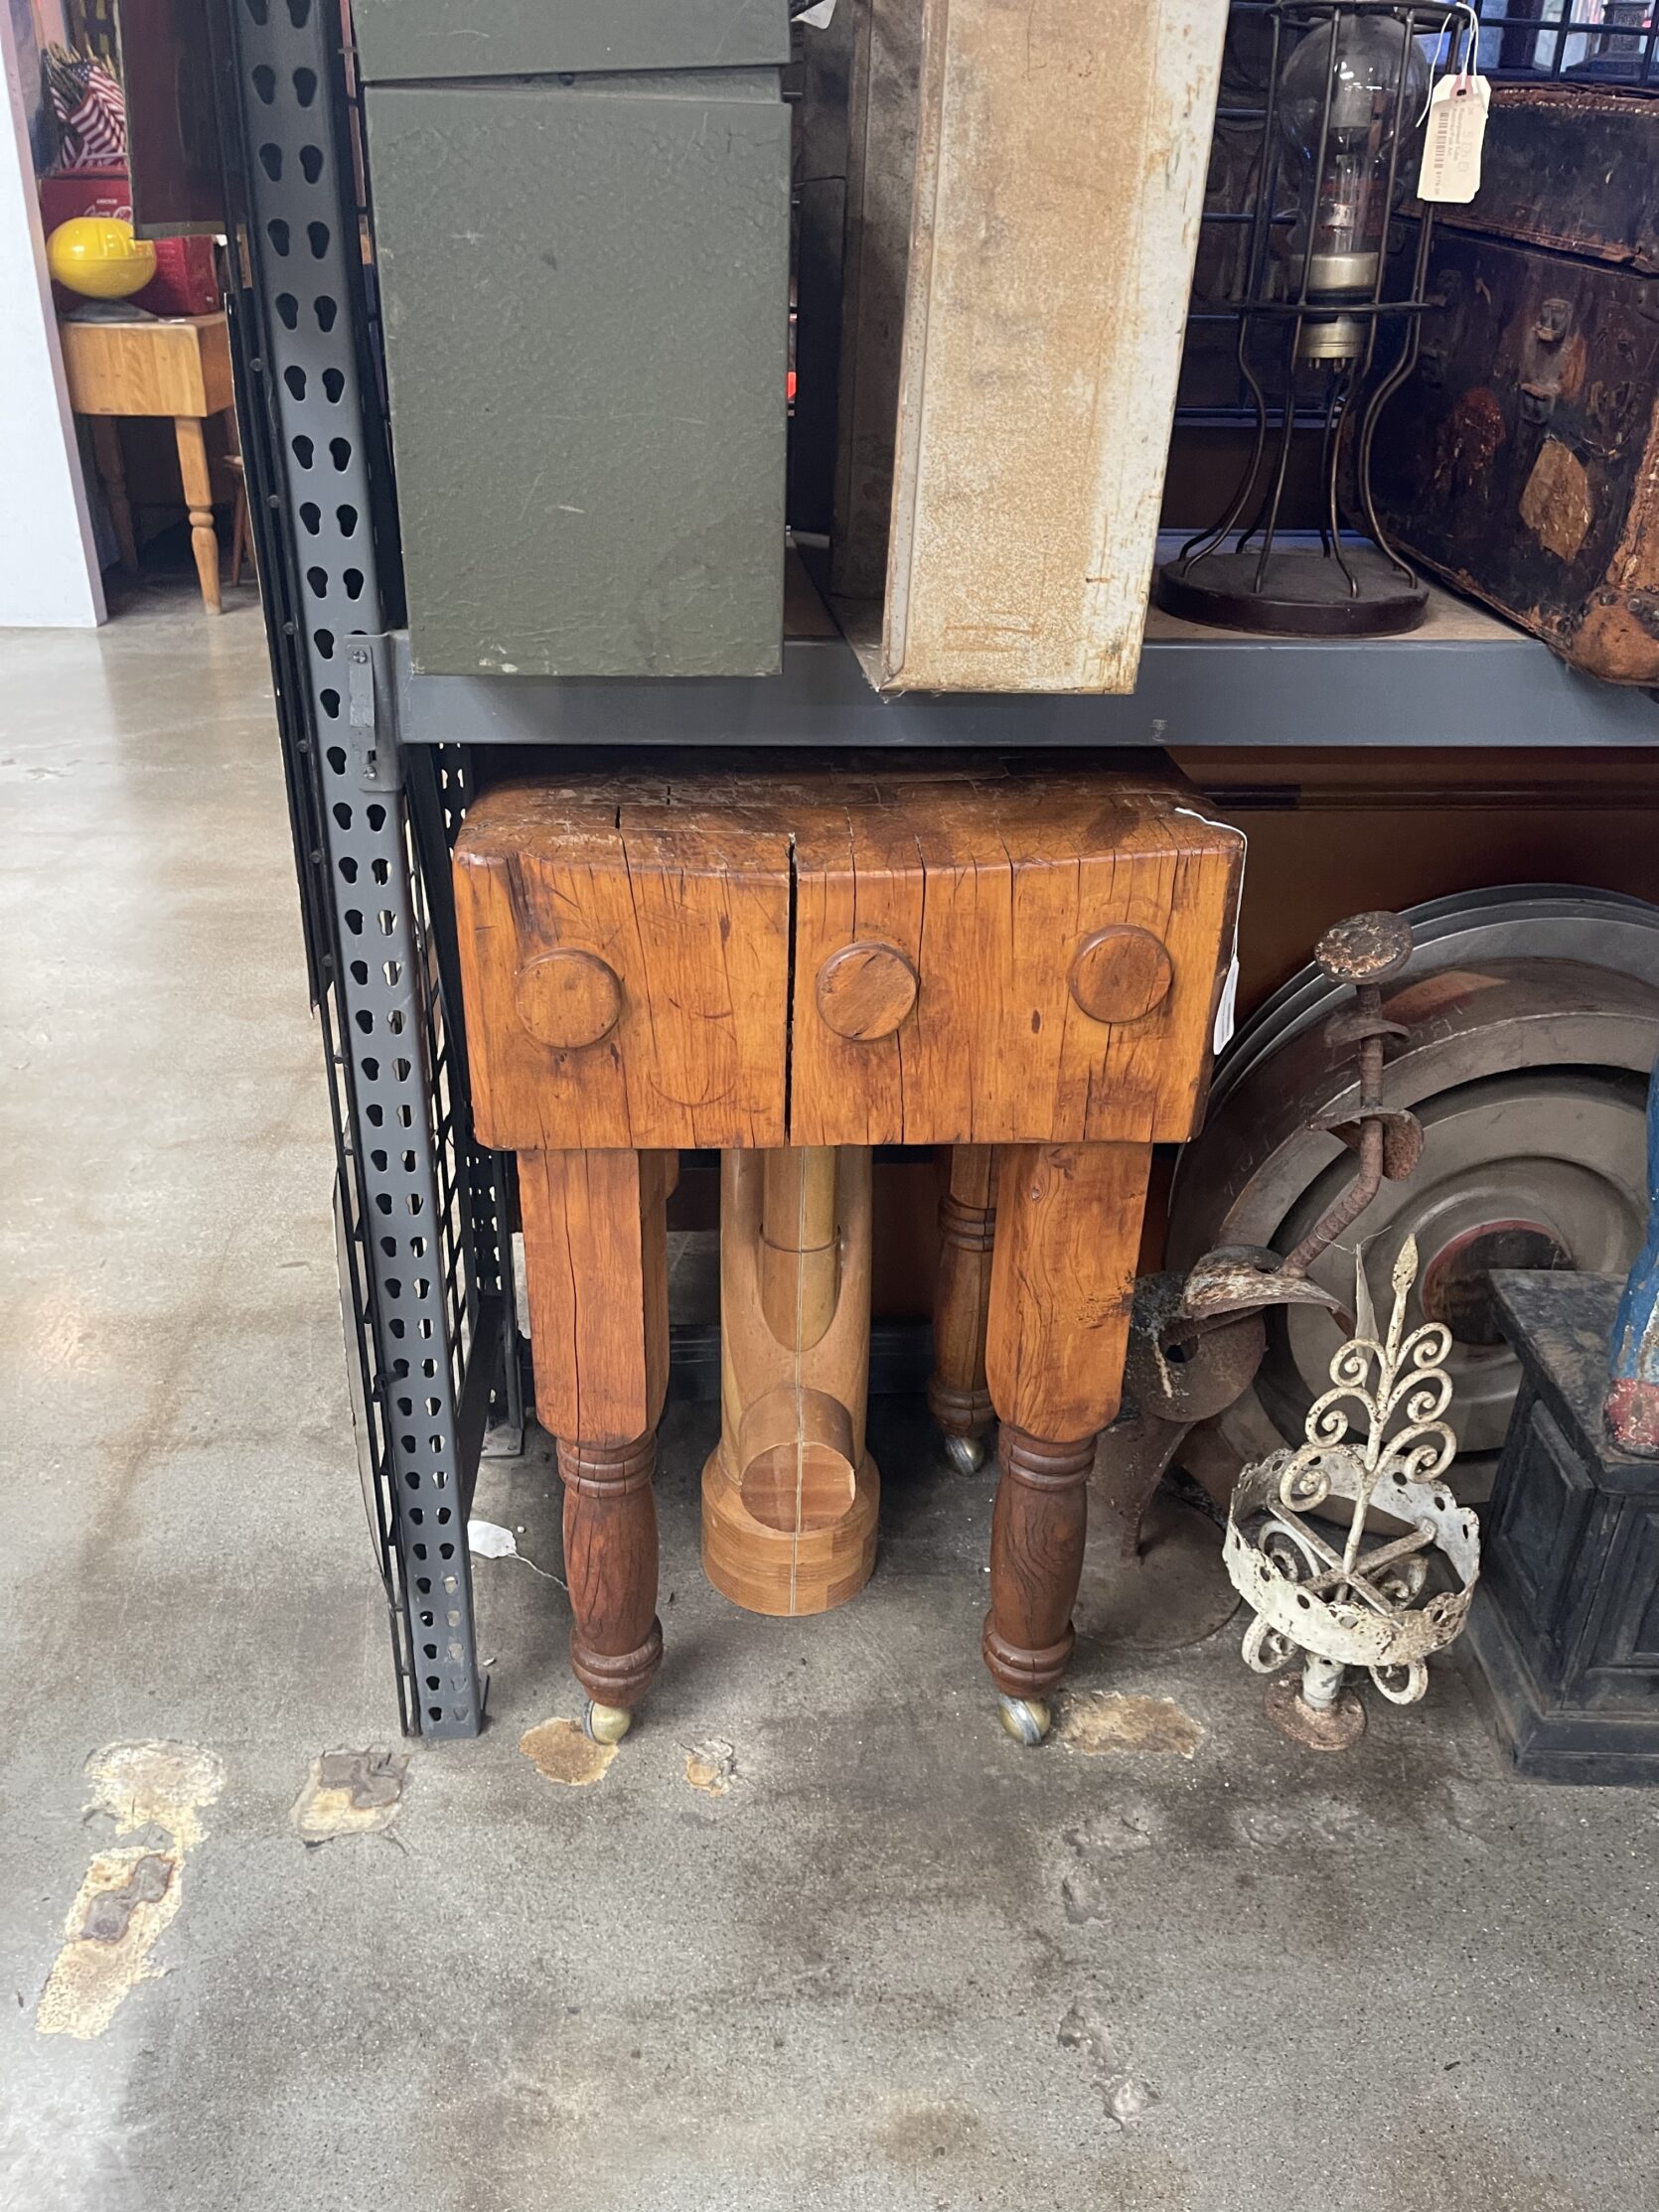
I mean. It’s just good! Look at those circles! I don’t remember how much it was but it was hard to pass up because I actually need some kind of table next to my oven. But guess who didn’t have her needed measurements??? Brady had a very similar one in his old kitchen so I have a soft spot for them for that reason too. EM HERE – JESS, I SAW THAT PIECE, TOO, SO GOOD BUT I THINK IT WAS SUPER EXPENSIVE IF THAT MAKES YOU FEEL ANY BETTER (LIKE OVER $800) Ugh. I held onto that brass vase for like 20 minutes but after asking Em if she thought it was worth $50 and her saying if it were $30 then yes, I put it back. I only regret it a little. I have SO MANY vessels that spending $50 on another one when I don’t know if I need it is completely unnecessary. That urn outdoor planter was just cool and made of metal so super heavy. Wasn’t going to buy it but really loved the shape. Here are two others I wasn’t going to buy but thought they were awesome. That side table would be cute in or outside and that mini chair would be well, probably useless, but so sweet to look at daily! Sorry, I don’t remember the prices. JESS!!! EM HERE. I NEED THAT SMALL HANGING CHAIR!!! THAT’S IT. NEW WORK REQUIREMENT THAT YOU HAVE TO SHOW ME EVERYTHING YOU PASS UP BEFORE WE LEAVE A STORE. 
If only I had a body of water to float this stunning weird beauty on. Again, another lifetime. But I actually did buy two things! Even I don’t fully get me sometimes but that ceramic face plate needed to be mine. And honestly at $30 (a little steep probably) I was willing to pay up. Then I did get something I did need – A planter. That patina’d cutie was the perfect match for my Parisian-inspired balcony so for $20ish I happily took it home for me (and you?) to enjoy:) Both of these were from Urban Americana and I am honestly a big fan. Great variety but not too overwhelming. It’s absolutely a must-go if you are in Long Beach. CaitlinHELLO, IT’S ME. You know I’ve said my piece already so LET’S GET TO THE GOODS. Look at these vintage beauts!!! 
I’ve been absolutely in love with these chests since writing this post and have the perfect spot in mind for one in my home, but this one was a little out of reach at about $1,400. That’s a GREAT price for such beautiful flamed mahogany with such special details – someone in the area, please go buy this from Urban Americana! – but it’s a little (read: a lot) beyond my budget right now. Back to FB Marketplace I go! I’m also currently experiencing a love affair with ALL campaign furniture. These Cleo Baldon-style chairs would have been perfect in my dining room if the leather had been a little warmer and I *wish* I had space for those flawless wrought iron outdoor chairs on the right. The lines and the shapes are just SO PLEASING to my eye. Do you agree?? 
I thought Em was going to love these dog paintings (you know, given her current search for pet portraits) but was SHOCKED when all three were a pass. It turns out that these felt a little too “movie set” and a little less organic, which I totally understand. Also, HELLO unintended mirror selfie! OH MY. In hindsight, I look at this marquetry lamp on the left and am like, “WHY DIDN’T I BUY THIS?” (Answer: it was $245, but that feels very fair for something like this TBH. I need to go back!!!) And that hand-painted lamp on the right was even more beautiful in person if you can believe it – the shades of pink were SO good. 
I bought this because I’m losing my mind and need to collect all things majolica/lettuce/cabbageware. In a crazy twist, I had actually pinned the radish version of this soup tureen on Etsy IMMEDIATELY before heading to Long Beach, which makes me feel like I manifested this one a little bit. It makes me surprisingly happy and I love it very much – SUPER worth the $25 I paid for it IMO. EMILY HERE – I’M MAKING CAITLIN WRITE A TREND PIECE ABOUT THIS BECAUSE SHE IS NOT ALONE. IT IS TENTATIVELY CALLED “I THINK I’M LOSING MY GD MIND” Those plates on the left are a classic case of NOT vintage!!! I was ABSOLUTELY JAZZED on all of these until I turned one over and realized that they’re still available at West Elm. They’re $12.50 new but they were still $10 here, so it wasn’t a good deal for me and I left them behind. But I did bring home those flower plates on the right. Em actually pointed them out to me – mainly because I couldn’t shut up about how much I love dinnerware from Bordallo Pinheiro and the pansy plates from Fitz & Floyd – and I’m SO GLAD she did. These 6 different color plates were made in Italy and they cost $70, which felt like a slam dunk for someone who has waited to buy plates for two years (!!!) because I like, REALLY wanted to find ones I loved. These were worth the wait 
GAH. Look at all these sweet glass shades!!! Why don’t I have any pendant lights!!! Two seating options, two VERY different styles. That strawberry chintz chaise on the left is SO FUN – I could see it looking right at home in a ton of modern-traditional designs. And that Overman Pod Sofa on the right was SUCH. A. DEAL. at $450. I wish I had space for it! (Here’s one in the original fabric for $1500 if you also love this spacey shape.) GIVE ME ALL THE REGENCY LEOPARDS AND CHEETAHS. Except not for like, $900. How fun is this, though? I am a low-key collector of these leather animals – I bought this elk as the first piece of furniture for a new apartment when I was 22 and broke (and I bought it instead of buying a sofa!! Like an actual lunatic!!) and I recently added a 4′ tall leather giraffe to the mix (my IG pals know all about the newly-named “bath giraffe” because he lives in my bathroom). But these guys are ALL over the place and they come in so many different animals and sizes – I just love the texture/warmth/weirdness they bring to a space. 
Would it really be an EHD trip if we didn’t ponder buying tiny chairs?? These were cool but the chairs wouldn’t fit under the table and I don’t know if I can have a non-functional tiny vignette in my house. A tragic pass. UGH EMILY HERE HOW DID YOU NOT SHOW THOSE TO ME??? I LOVE WEIRD DOG THINGS. That’s a leather decanter on the left with terrifying eyes (it has grown on me a lot since TBH) and I just loved those sweet fireplace tools on the right. I thought it was missing a piece so I passed but I now see that I am VERY dumb and that the fourth poker is laying on the ground RIGHT THERE. I think they were about $200 – so not cheap – but they make such a fun statement and feel like a keep-forever kinda piece. CAITLIN HOW DID YOU NOT SHOW ME THAT LEATHER DOG????? Does anyone know the history of that type of wooden art on the right? I thought it was SO COOL and I could just imagine it looking totally fresh and modern in a slimmer frame. I also walked around with that art on the left for 15 minutes before putting it back. It was $65 and the colors made my heart sing a little bit (plus one of the buildings just says “Restaurant” on it and for whatever reason, I LOVE THAT) but I ended up seeing a piece of art that I liked better, so I figured I didn’t love it enough to bring it home. 
This was the art I loved more – it’s a painting of the park that’s a few blocks from my house. I am VERY sentimental and really like collecting pieces that have ties to home (y’all have NO IDEA how many Delaware-related pieces of art and ephemera are in my apartment). MalloryThis post could also be titled “all the things Mallory should have bought while vintage shopping with the team” and I’m gonna show you ALL THE THINGS. I’m actually considering going back for a few of these things/maybe just need to buy different versions of them at different times in life. There were 2 items in particular that I know I will purchase eventually because they’re really fun/cool/creative things to have in your house. Let’s start with the first one: 
VINTAGE TIKI GLASSES. I thought I was so creative and unique when I saw all these awesome tiki cups and I told Emily “omg how cool would it be to have a bunch of different vintage tiki glasses and when your friends come over they can pick whichever one they want,” Em quickly responded with “oh my friends do that at their house…it is awesome!” So while it’s maybe not as original of an idea as I thought, it would be really cool to be a cool adult and do that. Now enter the second fun/cool/creative thing I want in my house: 
A VINTAGE GUM DISPENSER. HOW FUN IS THIS??? I want to have this in my house so people can just come up to it and grab whatever type of gum they want whenever. I think this would be SO FUN to have in like a den/bar/even a bathroom maybe?? Idk but I called my boyfriend desperately asking where we could fit this in our studio apartment that would maybe make sense. Still highly debating going back for it btw… 
This was a cute classic cutting board that I wanted because I knew it would look great in photos, but all in all I wasn’t sure if it was worth $50 since I’ve seen it in a few other places before…that handle is SO GREAT though. 
These mugs haunted me from store to store…I saw them and SWOONED (plus they were pretty affordable: 2 for $10 I believe). Since my cabinet space is extremely limited (hence why I didn’t end up getting the tiki glasses either) I passed on them, but then I found them at the next store we went to too!! They were following me I swear. It was hard to pass them up the second time but my exploding cabinets were begging me. Anyway, someone go grab them if you’re in Long Beach –– it was a great deal!! 
HI, IT’S CAITLIN AGAIN. I gotta know – did any of these pieces also catch your eye? Who on team EHD most aligns with your current style? And most importantly, do you think you could spend 3 straight days in a house with your coworkers and leave even MORE in love with them than you were before??? (I say it in every post, but we’re so lucky to be able to work together doing something so fun. 2 years in and I still can’t believe this is a job!! :)) Thanks for coming on a little vintage shopping trip with us – hope you had a nice time, too. See you back here tomorrow, yeah?? The post Emily’s Bon Voyage But Not Before A LOT Of Vintage Shopping – Wanna See What Caught Our Eyes… And Wallets?? appeared first on Emily Henderson. Originally from Emily Henderson https://ift.tt/3D3MLWT 
Happy Friday, my sweet plum pals! Today, I wanted to fill you in on my all-time favorite money-saving and stress-reducing hack: the gifting closet. In my case, “closet” may be a little bit of a generous term – “two shelves in the hallway built-in” is more appropriate – but it’s the best way I’ve found to make folks feel loved and seen without spending a ton. I don’t know if you also internalized the “never show up to someone’s house empty-handed” rule or if you’ve ever panic-purchased super overpriced baby books/wrapping material/cards while en route to a baby shower (guilty). But adding a little stockpile of potential presents has removed a ton of unnecessary anxiety from my life. And I don’t know about y’all, but it’s been a particularly tough couple of weeks for so many of my loved ones – when it rains, it pours – but being a thoughtful and supportive friend is WAY easier when the store is just at the end of the hall, you know? So yes, while I hope to save you some cash and to take a little load off your shoulders, I also hope that you’ll be inspired to brighten a friend’s day – it feels like we all kinda need it right now. 
Step One: Plan Your OccasionsHaving a stash of potential gifts for newly engaged friends is top of mind for me, but folks with children may have totally different priorities. (I’m constantly shocked by the number of birthday parties that kids are invited to!!!) What kind of things do you have coming up over the next year? Some notes to jog your memory… Events: It’s nice to have something on hand for birthdays, engagements, housewarmings, baby showers, graduations, retirements, bridal showers, weddings, and anniversaries. Just Because: This is a great catchall for all types of thoughtful presents – think of teacher appreciation, greeting gifts for new neighbors, “thank you” presents for your friends who watch your pets at the last minute (Just me? Too niche?), grief gifts (be sure to check out Velinda’s ideas here, too), welcome home presents, and host gifts. Holidays: You know the big ones, but Mother’s Day, Father’s Day, Valentine’s Day, Christmas, Hanukkah, Purim, Eid, Easter, and Galentine’s Day (know it’s a joke holiday, but it’s absolutely worth celebrating) are the first ones that come to mind. (Any others?) 
Step Two: Shop Your HouseA big caveat for my shopping lovers: do not buy things just to fill up your closet! You have plenty of time to stock up and make it special, but you’re going to want to start by looking at your own house. Are there any unused products or vintage pieces that deserve a new home? Full transparency: my gifting closet started accidentally when I missed the return deadline on a few of these Capri Blue reed diffusers. The scent is SO GOOD but it just felt like a miss for my home (kind of like how perfumes smell different on different folks). But instead of feeling like a bum who can’t manage their time, I was SO grateful to have missed the return deadline when a neighbor who loves candles and diffusers volunteered to watch my cat at the last minute – a diffuser packaged with a bottle of wine and a few bath bombs in a vintage basket made the perfect “thank you” gift. My closet grew from there – it was so fun to shop my own house and look for goodies that could be repurposed as presents in the future. 
Step Three: Keep an Eye OutOnce you’ve taken inventory and know what you already have, the fun of expanding your gifting options can ACTUALLY begin. All that said, if I were building my closet again from scratch, here are the slam dunk presents that I’ve given in the past and the types of things I’d keep an eye out for… Guaranteed Winners
1. Textured Ceramic Jar Candle Sandalwood & Tobacco | 2. Match Striker | 3. Write On Pen Set | 4. Gia Rectangle Claw Clip | 5. Indigo Blue And White Striped Pedestal Planter | 6. Wood Stone Tray | 7. Salida Bottle Opener | 8. Garden Scissors With Pouch | 9. Oil Diffuser We’ll talk about this a little later, but the real key to these gifts is to pair them with a “live” buddy – so like, YES, bring your friend a beautiful bottle opener…alongside a nice 6 pack. Bring a tray WITH a crusty baguette from the grocery store. Grab a vase and then add a little floral arrangement. Fill up a vintage jar with a homemade treat or a salt scrub or a bath bomb. You can really get personal here and it’ll make it seem like you spent hours shopping for the perfect gift instead of a few quick minutes pulling from your own personal stash A few things to note: candles and scents can be such great gifts, but try to keep the packaging neutral – in this case, a ceramic or stone or terra cotta jar will make it feel a little more elevated than the standard glass-with-sticker packaging. The same thing goes for trays, match strikers, vessels, jars, and planters. While I’m usually a fan of a maximalist moment, gifting decor can be VERY tricky so it’s best to keep it simple. Beyond decor, there are a few other surprise slam dunks that I’ve found – hair accessories (especially simple clips like these – no shame in splitting up a pair!), nice pens, and elevated basics (like this vintage corkscrew) can really put a smile on people’s faces. I also love keeping some nice salt and sage on hand for housewarmings (if you also want to buy a smudge stick to gift, please purchase from an Indigenous vendor – Sheyenne from Whispering Winds is my favorite!). For Culinary Types
1. Stoneware Mug | 2. FIVETWO Ultimate Apron | 3. Chop Whitewash Wood Bowl | 4. Helms Gold Cheese Knives (set of 3) | 5. Minimalist Measuring Cups | 6. Drink Rocks | 7. “Cook This Book” Cookbook by Molly Baz | 8. Stud Decanter | 9. Assorted Airtight Silicone Lids (set of 5) | 10. Trio Marble Serving Board | 11. Teak Measuring Spoons | 12. Old World Italian by Mimi Thorisson Again, the pairing is key – these stoneware mugs are SO luxe and weighty and expensive-looking despite their tiny price tag (only $7.99 for 2!) and would be SO GREAT to gift alongside with some nice coffee or tea. I’m also a huge fan of the apron – I find that folks LOVE wearing them but rarely purchase them for themselves – and this one from Food52’s line is so good. It comes in a few other lovely colors, too And while these are all new, it’s fun to keep an eye out for vintage bowls, carafes, decanters, cookie jars, and goblets when you head out to the flea market or thrift shop. I feel like these vintage wooden pineapple bowls, this AWESOME carafe with a racehorse stopper, or this sweet little spice jar would be super great gifts. For Self-Care Lovers
1. BIG MOOD Bath Soak | 2. Dr. Jart+ Dermask Water Jet Soothing Hydra Solution | 3. KNC Beauty Collagen Infused Lip Mask Set | 4. Turmeric Botanical Bar | 5. Nécessaire The Body Ritual | 6. Honest 4-Ounce Organic Body Oil | 7. Goodnight Set Sleep Mask & Gua Sha | 8. Superfood Latte Sampler | 9. Prima Bath Gem 25mg CBD Bath Soak for Relaxation & Recovery Does part of my gifting shelf look like the checkout line at Sephora? Yes. Am I ready to show up at your house with a bunch of face masks when you’re having a bad day? ALSO YES. I usually just stock up on a ton of these sheet masks at Target, but you can really grab anything that strikes your (or your pal’s) fancy. There are a ton of tiny and easily storable gifts to scoop in this arena – though these ones above are our tried-and-true favorites For Kids
1. Straw Constructor STEM Building Toy | 2. Paint-Your-Own Wood Tea Set Kit | 3. LEGO Marvel Spider-Man | 4. Small Security Blanket Bear | 5. Green Toys Submarine | 6. Give It A Swirl Tie Dye Kit | 7. ‘If I Were a Puppy…’ Book | 8. 60pcs Magnet Building Tiles | 9. Nail Polish Set So uh, I don’t actually know any kids (which I think is normal for someone with almost exclusively childfree friends!) but I do always have at least one baby book (looking at you, #7) for showers on hand. That said, it seems like y’all DO know kids, so we pulled some EHD-favorites for ya in case your child keeps getting invited to their classmate’s birthdays and you’d rather not break the bank at the last minute while you’re en-route to parties. Being said, I LOVE having adult coloring books, fun markers/crayons/colored pencils, journals (these are my favorite), puzzles, and cool playing cards on hand which could all probably do double-duty as a kids’ gift in a pinch! This gradient puzzle is my all-time favorite thing to gift (I have six of them in my apartment right now, no joke) and it seems like it’d be a blast for people of any age. Also a huge fan of these Strawberry Thief playing cards (there are a ton of other classic Morris prints, too!) which are another awesome elevated basic. And All The TrappingsDo we all hang on to every nice gift bag we receive, or is that just a weird thing that my family does? In any case, there’s no reason to rush out and grab a whole bunch of bags/wrapping paper/bows/ribbons right now. Build up that collection slowly over time! 
1. Vintage Finnish Pedestal Bowl | 2. Tiny Vintage Brass Basket | 3. Mid-Century Collapsible Basket Being said…I love a vintage basket, box, or pedestal bowl for gifting. You grab some tissue paper, slide your gift in there, give it a little zhuzh and MAN, you have a beautifully presentable present!! There are wildly affordable container options all around ya – vintage baskets are SO cheap when you buy them in person – so just keep your eyes peeled the next time you head out on a shopping trek. The holidays are right around the corner, after all Step Four: Then Organize ItWhen it comes to organizing your gift closet/shelf/bin/container under the bed, less is more. You don’t need a million specialty products – just something that can corral your gifts and trappings! If you’re a small space dweller (or trying to hide presents from the other people in your household), consider throwing everything into one big suitcase. If you already have some plastic bins, use those! But if you’re looking for something a little more elaborate or organized, all of the following have nearly perfect ratings from people whom I assume are VERY well-loved by their friends and fam. 
1. Hanging Gift Tote Organizer | 2. Elfa White Mesh Gift Wrap Cart | 3. Grey Wrap & Tote Organizer | 4. Customized Gift Wrap Center | 5. White Elfa Utility Mesh Gift Packaging Over the Door Rack Solution | 6. 20 gal. Clear Weathertight Trunk If you can’t tell from the earlier photos in the post, that over-the-door organizer is a HUGE deal in the gifting closet blog world. I’m planning on organizing a walk-in closet in my apartment soon (installing shelves and everything!) so this is actually one of the first items on my to-buy list as the reviews are GLOWING. But there are a ton of other options if such over-the-door storage isn’t your thing. I’m so impressed by the construction of #2 (you KNOW Leslie Knope had one of these carts in her hoarder house!!) and the size of #3. There are solutions for all kinds of homes! Hooray! 
Step Five: Gift ItWe’ve started to go over this, but I’ve recently come to the conclusion that the best, most thought-out physical gifts have five parts (we all know that experiences are a whole different ballgame!!):
There you have it – the five steps to creating the gifting closet of your dreams. Save money, reduce stress, feel organized, and gift better – what else could you ask for?? If anyone else has any tips or favorite storage options, please drop them below – I’m excited to hear from you Opening Image Credits: Photo by Tessa Neustadt | From: Ban.do Overall The post An Anxiety Relief Hack That Will Make You And Your Loved Ones Feel VERY Good – It’s Called The Gifting Closet appeared first on Emily Henderson. Originally from Emily Henderson https://ift.tt/3svRlbA |


 These fit my 2.5-year-old pictured and my 4.5-year-old both very well. We also loved the adjustable Old Navy ones but they’ve been discontinued. Stride Rite has some decent ones but they do fit quite tightly and thus get wet right away (IDK what kids do behind there but their masks are always soaked). If you can’t tell I’ve spent SOME TIME on this and have bought like 8 different brands to try. So far Baggu is the best but waiting on some others to arrive.


 . I also designed the floating vanity and feel it adds some nice warmth to the bathroom.


 . I have saved the story on


